Login & Access Control
Interguard supports several user access roles with varying levels of restrictive access to Interguard settings and data. You can add and modify additional login accounts from Admin | Login & Access Control. As an example, you may choose to have a manager oversee their particular group comprised of their direct reports.
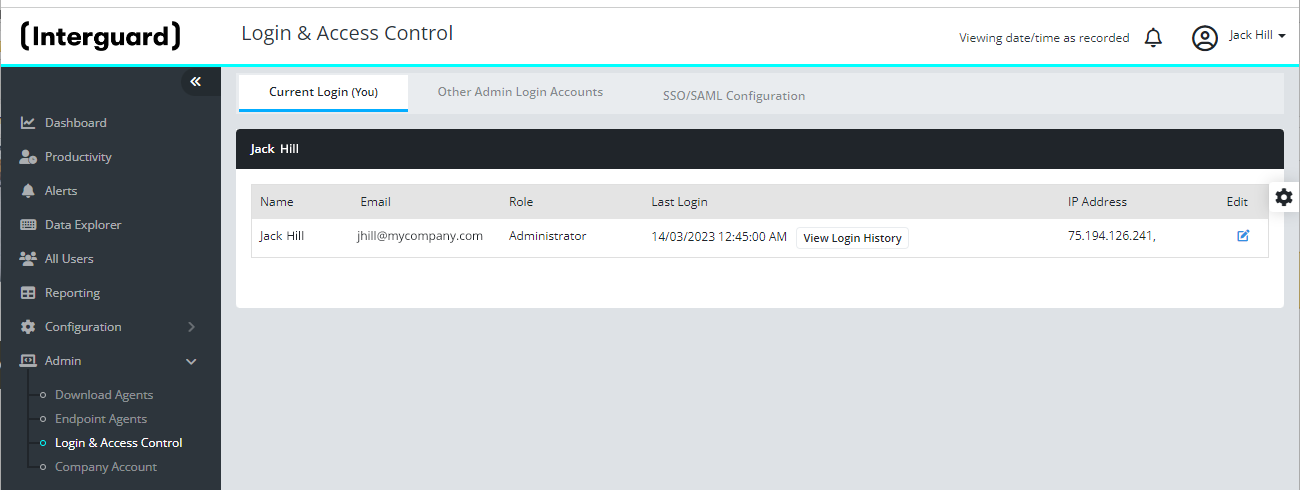
Account roles
Three levels of login accounts are available. All roles can can be limited to viewing/configuring specific user groups.
- Administrator - The initial account owner and any Login with Administrator access can access all features and configurations.
- Manager - Can access access Data Views and specific configurations.
Manages groups as set up by the Administrator.
Excluded from Add Groups, Login & Access > Other Accounts and Subscriptions. - Limited - Can access Data Views and the Endpoint Agents list.
Excluded from Download Agents, Configuration, Login & Access Control, Company Account, and Subscriptions
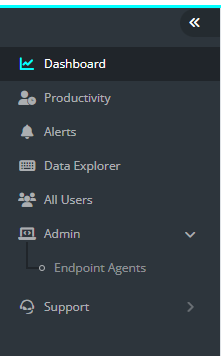
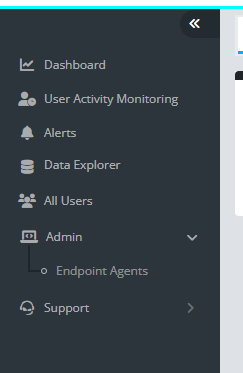
Limiting Groups
An Administrator adds Limiting Groups when setting up or editing a Login Account. Limiting Groups limit view of data by group in the Dashboard, Productivity, Alerts, and Data Explorer. There may be several reasons for adding Limiting Groups:
- Administrator - A non-manager admin whose role is to install and update agents and manage login accounts does not need to view data for any user group.
- Manager - A department manager needs visibility of activity in his or her group only.
- Limited - An outside investigator can view data of selected individuals without viewing users not under investigation.
Account role actionAccount role action break-down table
The Interguard pages and actions available to each account role are listed below.
| Page ( and page tabs ) | Actions | Administrator | Manager | Limited User |
| Dashboard | View and Manage Charts |  |
 |
 |
| Risk Management | View Risk and User Details |  |
 |
 |
| Productivity | View Productivity |  |
 |
 |
| Change Workday Settings |  |
 |
 |
|
| Change Productivity Settings |  |
 |
 |
|
| Schedule Report |  |
 |
 |
|
| Alerts | View Alerts |  |
 |
 |
| Data Explorer | View Data Explorer |  |
 |
 |
| All Users | View Users within Limiting Groups |  |
 |
 |
| Reporting | View/Add/Edit/Delete |  |
 |
 |
| Configuration | Groups & Policies | View Configurations |  |
 |
 |
| Add/Edit/Delete Groups |  |
 |
 |
|
|
|
Move Users to Groups |  |
 |
 |
| Hide Users |  |
 |
 |
|
|
|
Add/Delete Recording Policy |  |
 |
 |
|
|
Edit Recording Policy |  |
 |
 |
| Configuration | Productivity Settings | Change Ratings, Assign to Group |  |
 |
 |
| Configuration | Alert Word Settings | Add/Edit/Delete |  |
 |
 |
| Configuration | Notification Settings | Add/Edit/Delete |  |
 |
 |
| Admin | Download Agents | Download Agents |  |
 |
 |
| Admin | Endpoint Agents | View, Set Device Name |  |
 |
 |
| Move Devices to Groups |  |
 |
 |
|
|
|
Hide Devices |  |
 |
 |
|
|
Uninstall Agents from Devices |  |
 |
 |
| Admin | Login & Access Control | Edit your own name, Set Time Zone, Set 2-Factor Authentication on your account |  |
 |
 |
| Add/Edit/Delete other Accounts |  |
 |
 |
|
| Admin | Company Account | View/Edit |  |
 |
 |
| Support | View |  |
 |
 |
| Subscriptions | View |  |
 |
 |
Add Add a login account (Administrators only)
To add an account you must have Administrator-role privileges.
- Go to Admin | Login & Access Control
- Select the Other Admin Login Accounts tab and press Add.
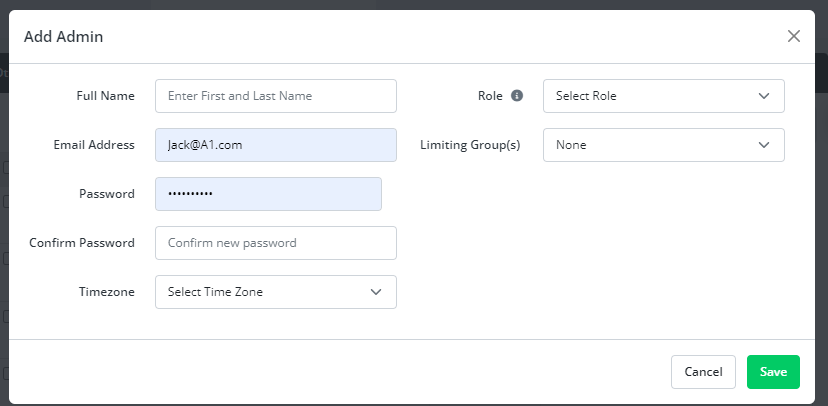
- Fill in the account user's information:
- Full Name - Type a first and last name. Do not use the email address in this field.
- Email Address - Your email address appears initially, but the new account will use their own email address.
- Password - The account password must have a minimum of 6 characters and contain at least one lowercase letter and at least one number.
A password may not include any of these special characters: { } [ ] ( ) / \ ' " ` ~ , ; : . < > - Confirm Password - Type the password again.
- Timezone - Select the timezone that applies to this login account user.
- Role - Use the dropdown to select one of the three roles: Administrator, Manager, or Limited.
- Limiting Group(s) - Optional.
None - The account login has access to data for users in all groups.
Select a group from the dropdown list to limit the account owner to viewing data for only the selected group. Click the + below the frist group to add and select from a second dropdown.
- Press Save to add this login account.
NOTE: An Administrator or Manager account owner can change their own password and enable two-factor authentication.
Change your own account information or passwordChange your own account information or password (Administrators, Managers)
If you are an Administrator or Manager account owner, you can change your own password:
- Go to Admin | Login & Access Control.
- Select the Current Login (You) tab.
- Press the Edit icon.

If you wish, you can change your name (as it appears in Interguard) in the first field.
- Check the checkbox next to the first Password field to activate it.
If you have two-factor authentication enabled, at this point, you are prompted to enter the code from your authenticator app.
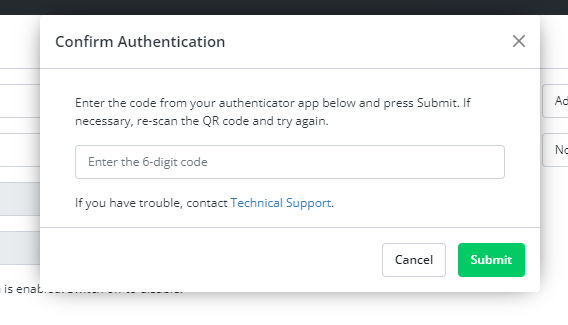
- Enter and confirm a new password.
The password must be at least 6 characters with a lower case letter and a number and not contain any of the following:
{ } [ ] ( ) / \ ' " ` ~ , ; : . < > - Press Save to save the password.
Enable two-factor authentication Enable two-factor authentication for your account (Administrator, Manager)
If you are an Administrator or Manager account owner, you can enable two-factor authentication for yourself. The next time you login to Interguard, you will be prompted to enter a unique code from the Google Authenticator app.
- From Admin | Login & Access Control | Current Login (You), press Edit.
- Toggle the Google Two-Factor Authentication switch to ON (green).
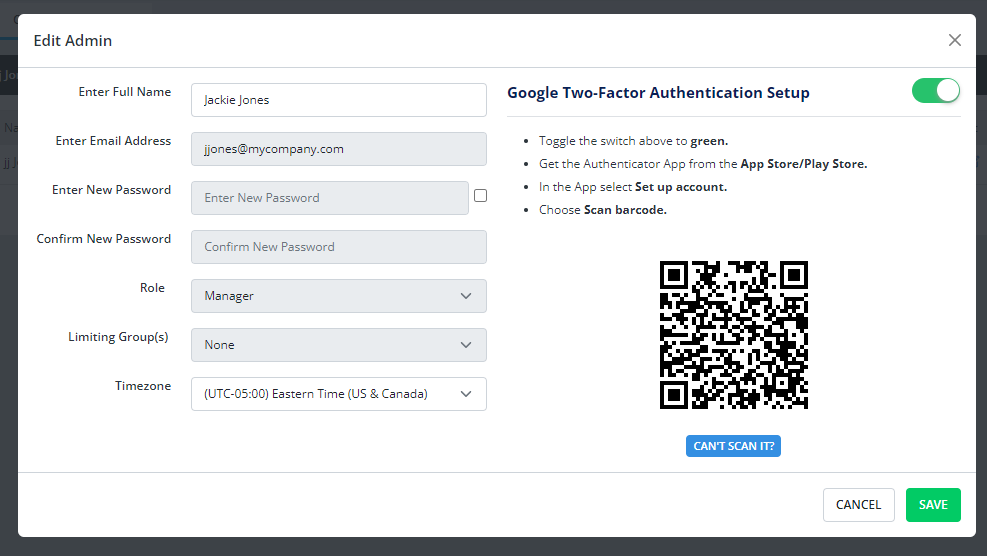
- If you don't have one, download an Authenticator App (Google Authenticator, Microsoft Authenticator, or another app) to your mobile phone.
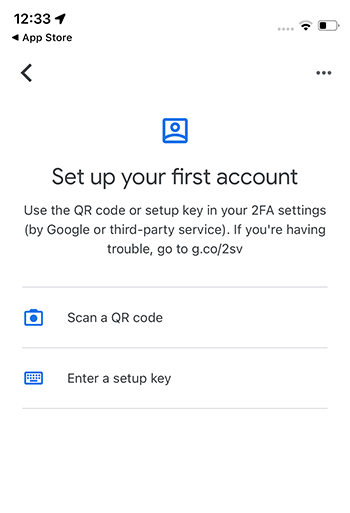
- In the App, select Set up Account.
- Choose to Scan a QR code.
- Focus your phone on the code onscreen. When the code is accepted, you are ready to go.
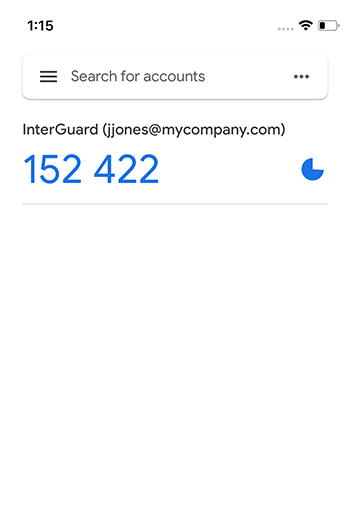
- The next time you log in to Interguard, after entering your credentials you will be prompted for the code displayed on the Authenticator app on your phone.
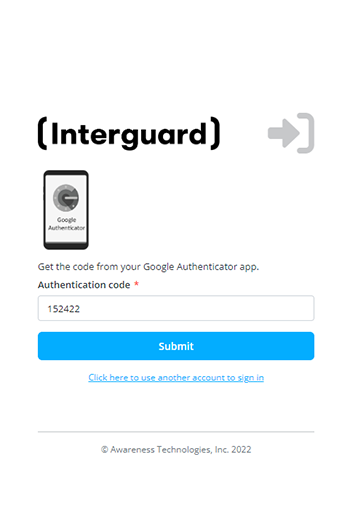
- To disable two-factor authentication, log in to the app, and switch two-factor authentication OFF.
Manage other login accountsManage other login accounts (Administrators only)
As an Adminstrator user, if someone has trouble logging in, needs a new password, or has a Limited role, you can help them manage their account.
- In Admin | Login & Access Control, select Other Admin Accounts.
- Find the account owner in the list who needs help and click the edit icon.
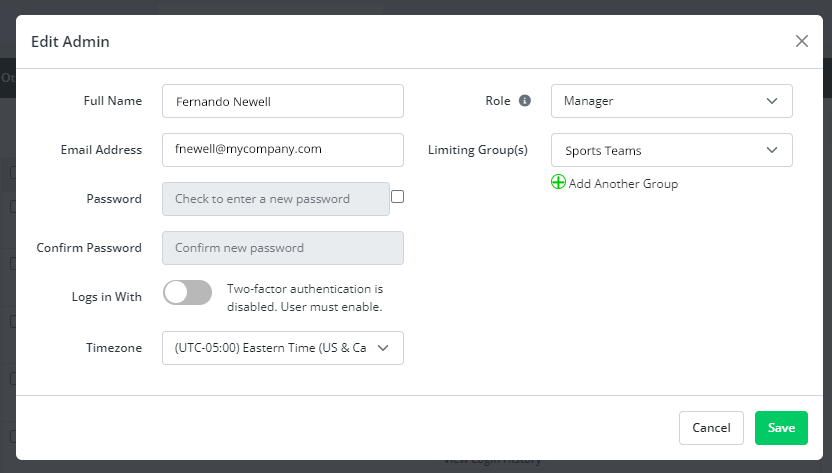
Change fields as needed:
- Full Name / Email Address - Type over the original entry.
- Role - Use the dropdown to select one of the three roles.
- Limiting Group(s) - Click the + next to Add Another group, and then select a group from the dropdown.
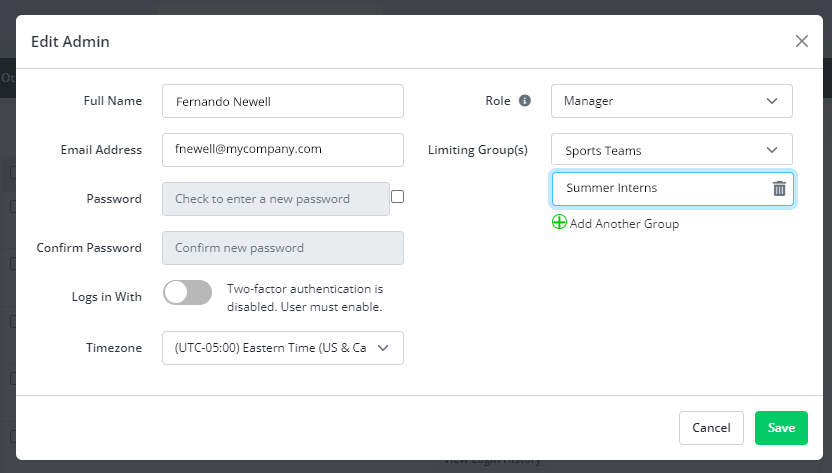
- Password - To change the password, check the box next to the first Password entry and enter and confirm the new password. If the admin has two-factor authentication enabled, you are prompted for authentication code from THEIR mobile app. However, you can DISABLE two-factor authentication and allow the admin to re-enable it from their own Current Login page.
- Logs in With - If disabled, you cannot enable two-factor authentication for a user. If enabled, you can switch it off.
- Timezone - Set a new UTC offset timezone for the admin.
- Save your changes. The next time the other admin logs in, he or she will see the changes.
Disable two-factor authentication othersDisable two-factor authentication others (Administrators only)
If someone has trouble with two-factor authentication, an Administrator can log in to the app and disable it.
- In Admin | Login & Access Control, select Other Admin Accounts.
- Find the account owner in the list who needs help and click the edit icon.
- Next to Logs in with, click the switch to turn it off.
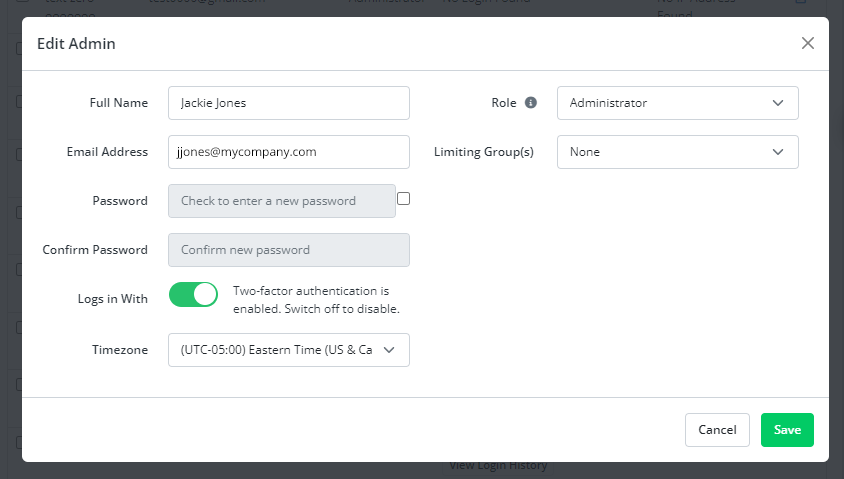
- Save your change. The other admin can now login using just a password.
NOTE: You cannot enable two-factor authentication for another user.
Updated: 07/25/24