ESET Protect Cloud
Applies to: Agent version10.0.47390.40
To allow downloading and installing the Interguard Windows Agent, follow the steps below before you begin. Your ESET product may differ from the one shown here. We recommend consulting the ESET KnowledgeBase for your product version for more accurate steps. However, do use the recommended exclusions below. See Antivirus Exclusions for Windows for a complete list of files, and if you still have trouble, contact Support.
NOTE: We cannot guarantee our instructions are compatible with your updated program. Always check the Help for an antivirus program if you have questions. Be sure to re-enable any firewalls or scanning that you disable during installation once the agent is successfully installed.
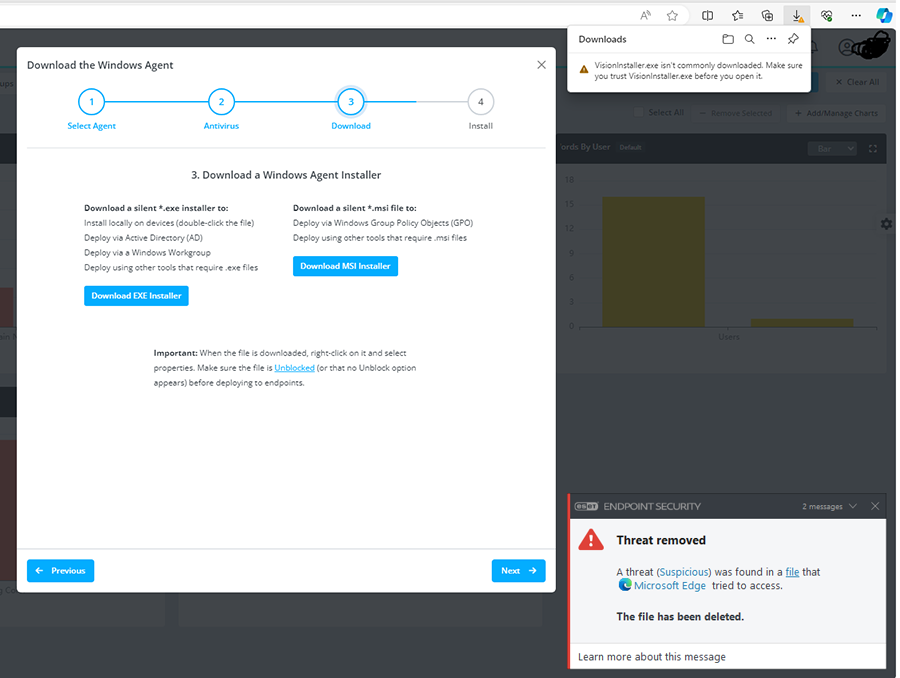
Attempt to download the agent
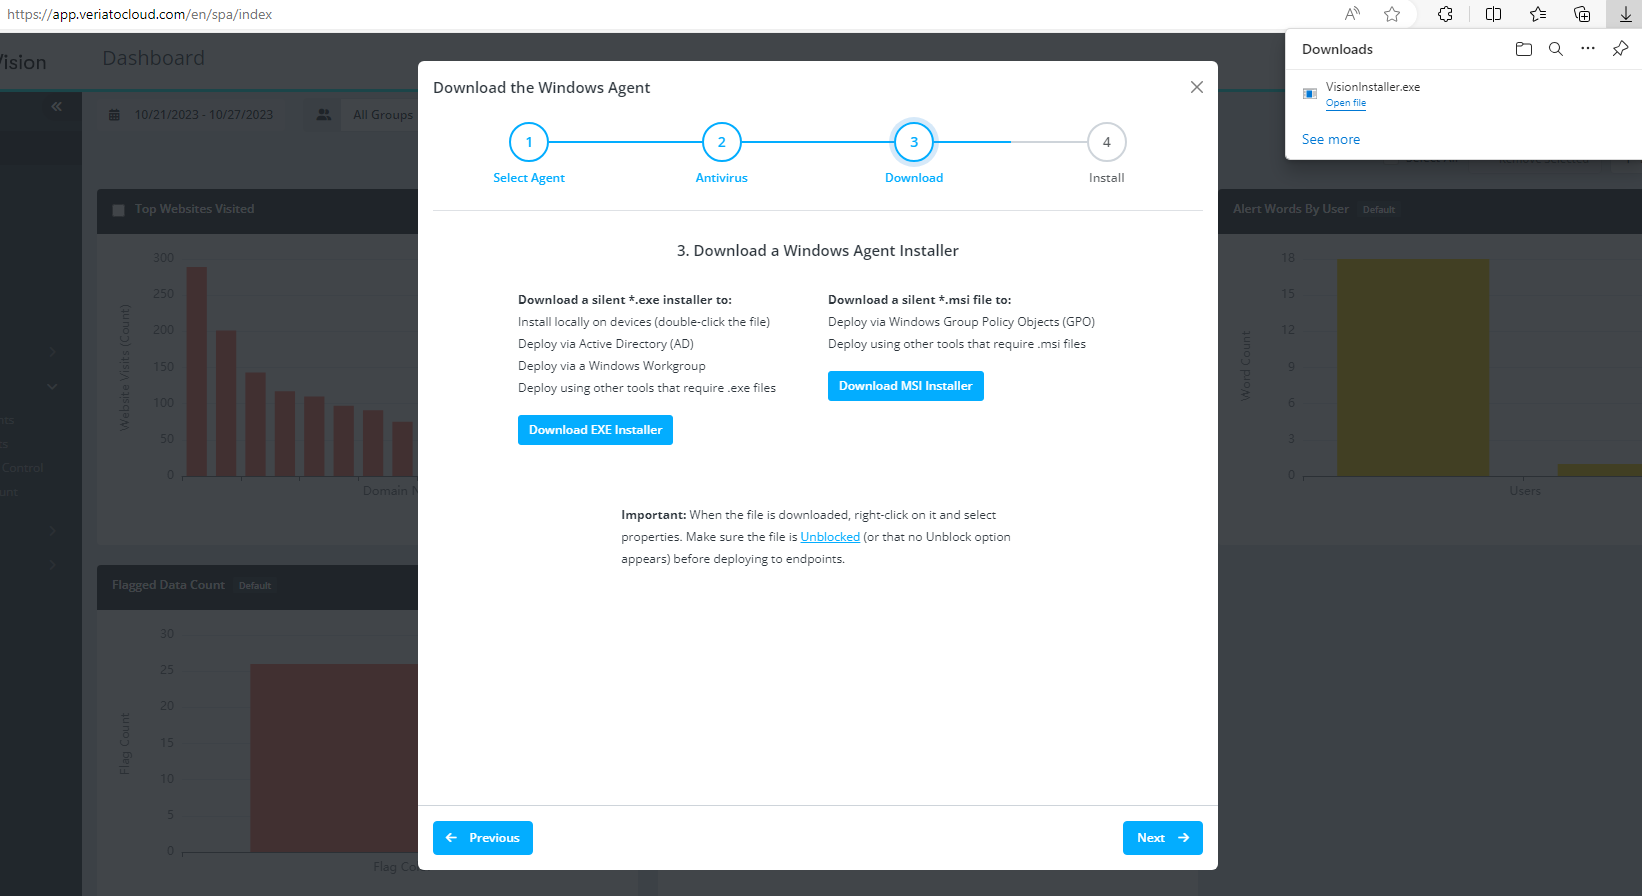
On a workstation where ESET is installed, access the console app and use Admin | Download Agents wizard to download the Windows agent. This step will allow you to retrieve the file hash in the next step.
- There may be a browser warning.
- An ESET message warns that a "Threat" file was removed.
- Follow the steps below before downloading the installer file again.
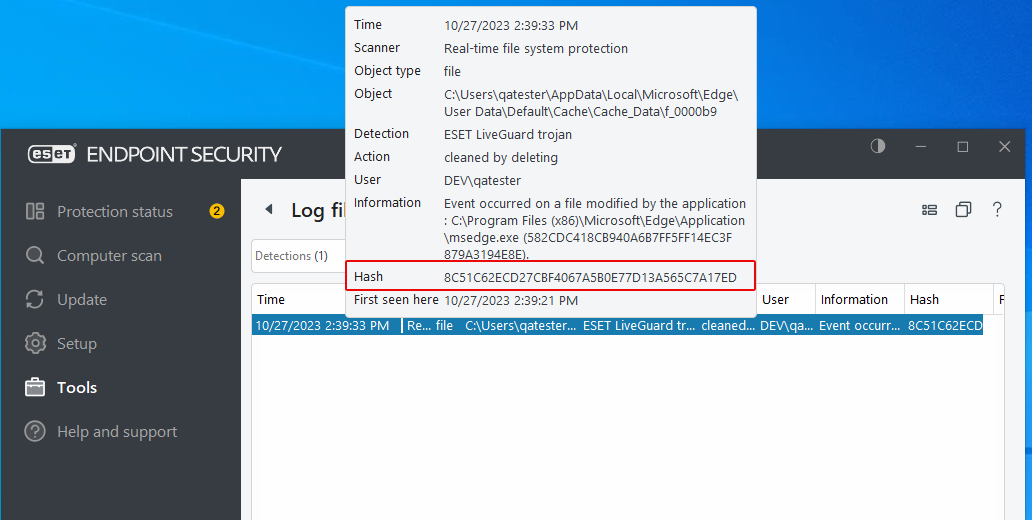
Retrieve a file hash from the workstation
- Open the ESET Endpoint Security workstation console.
You will find ESET in the Windows task bar. - From the menu, select Tools > Log files.
You will see that the installer file has been detected as a "trojan."
Click on the entry for the removed file.
Find and copy the hash for detected file. Paste it into notepad to use in the steps below.
Download four exclusion lists
Importing a list conveniently adds the exclusions you need to the correct area of ESET. Click these links to download text files containing the exclusions you need. These lists are also included at the end of this article.
Import exclusions into ESET Protect Cloud
- Login to ESET Protect Cloud portal
To set exclusions, open a browser and login to your ESET portal. - Select Policies from the side menu.
On the Policies page, hover over the policy that applies to the devices where you need to add exclusions. Click on three dots displayed on hovering. - Select the Edit option to open the Edit Policy page.
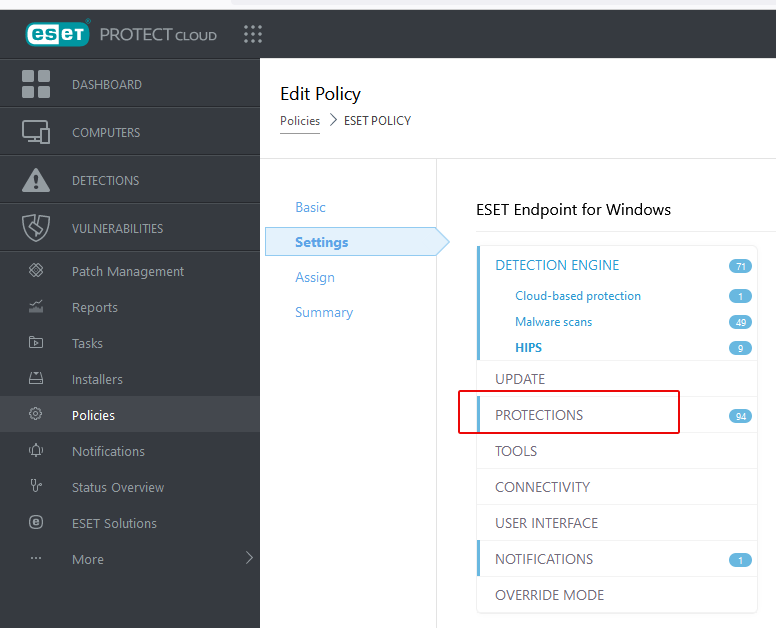
Click on the Settings option.
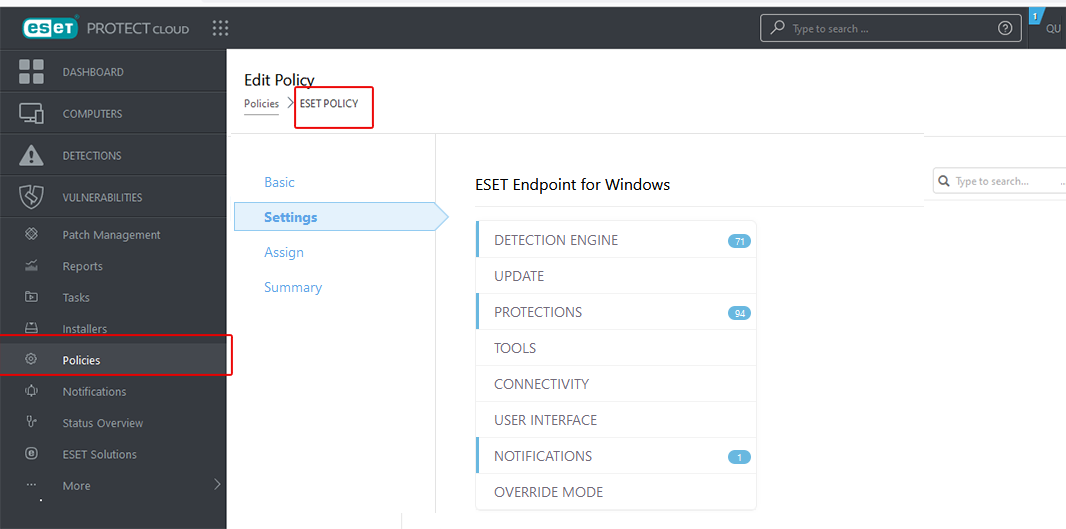
- Select Detection Engine.
A menu presents options. You will need to add:
- Performance Exclusions
- HIPS Exclusions
- Processes Exclusions
- More > Exclusions
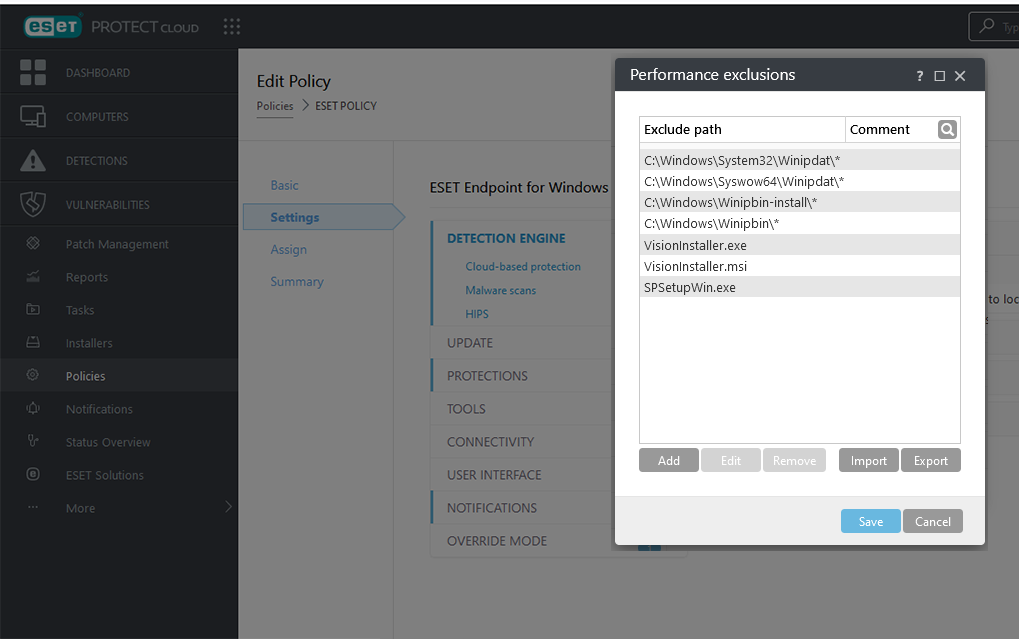
- Import the Performance exclusions.
- Under Detection Engine, select Exclusions > Performance exclusions. Click Edit.
- On the Performance exclusions panel, click Import.
- Navigate to and select your downloaded Performance_Exclusions.txt file.
- The Exclude path list should be populated with the imported paths as shown below. Click Save.
- Import the HIPS exclusions.
- Under Detection Engine, select HIPS.
- In the right panel, under Host Intrusion Prevention, find Deep Behavioral Inspection.
- Next to Exclusions, click Edit.
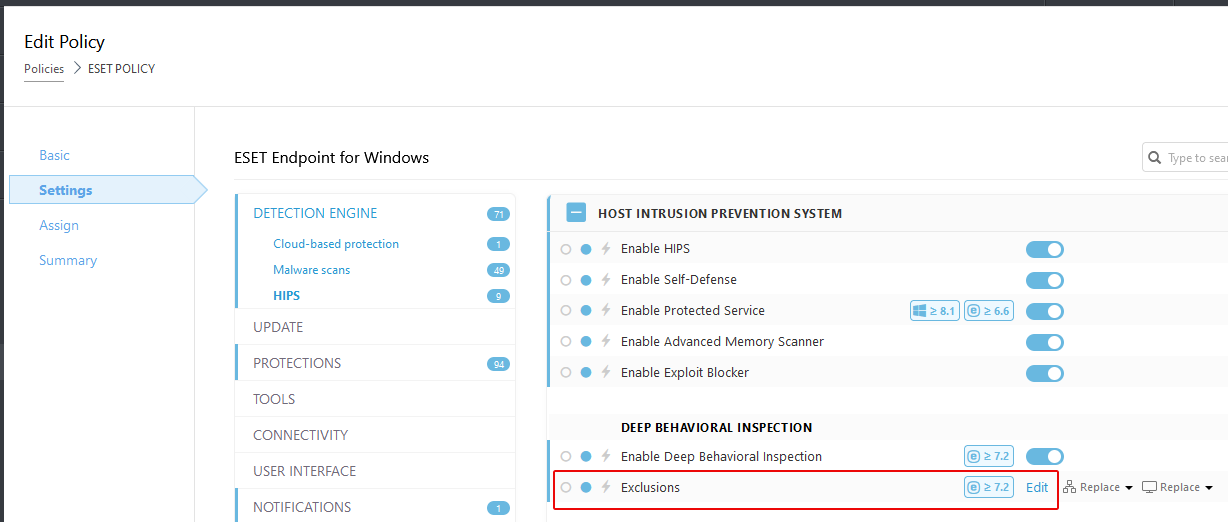
- On the Exclusions panel, click the Import button.
- Navigate to and select the provided HIPS_Exclusions.txt file.
- Click Save.

- Import the Processes Exclusions.
- From Settings, select Protections.
- Select Real-time file system protection.
- Next to Processes Exclusions click Edit.
- On the Exclusions panel, click the Import button.
- Import the exclusions from the Processes_Exclusions.txt file.
- Click Save.
- Next, select Assign and choose the workstation(s) where you plan install the agent.
- Click Finish.
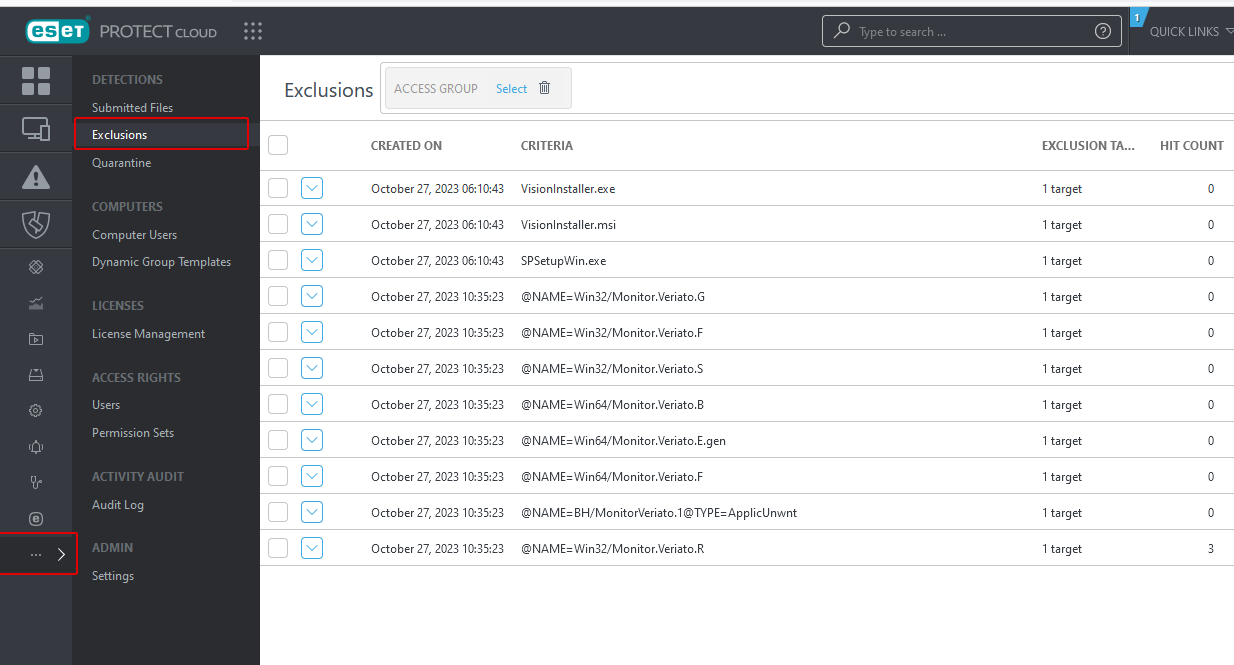
- Import the final Exclusions file.
- At the bottom of the ESET sidebar, select the ... menu item and choose Exclusions.
- Click Import.
- Import the exclusions from the provided Exclusions.txt file. The imported files should appear as shown below.
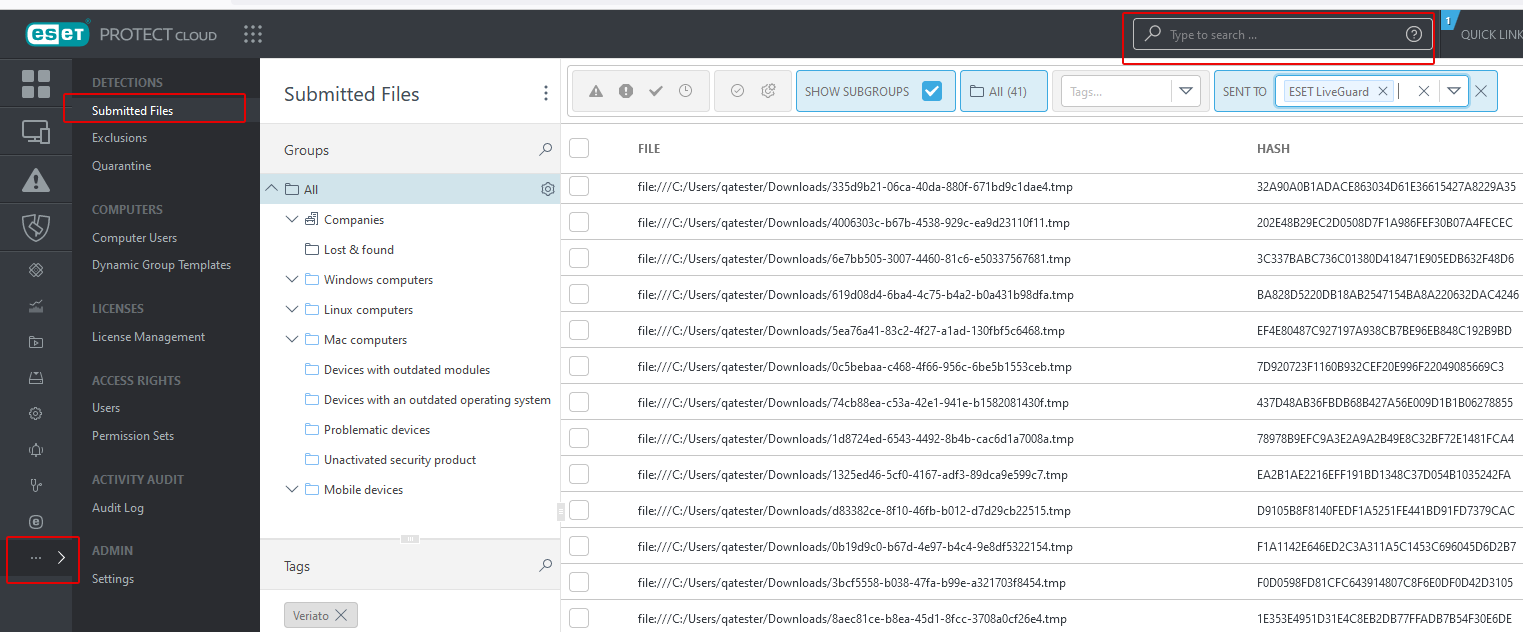
Add the hash you saved as an exclusion
- Select More > Submitted Files.
- Search for the hash.
Use Search to find the hash you copied from ESET above and saved.
Hover over the file.
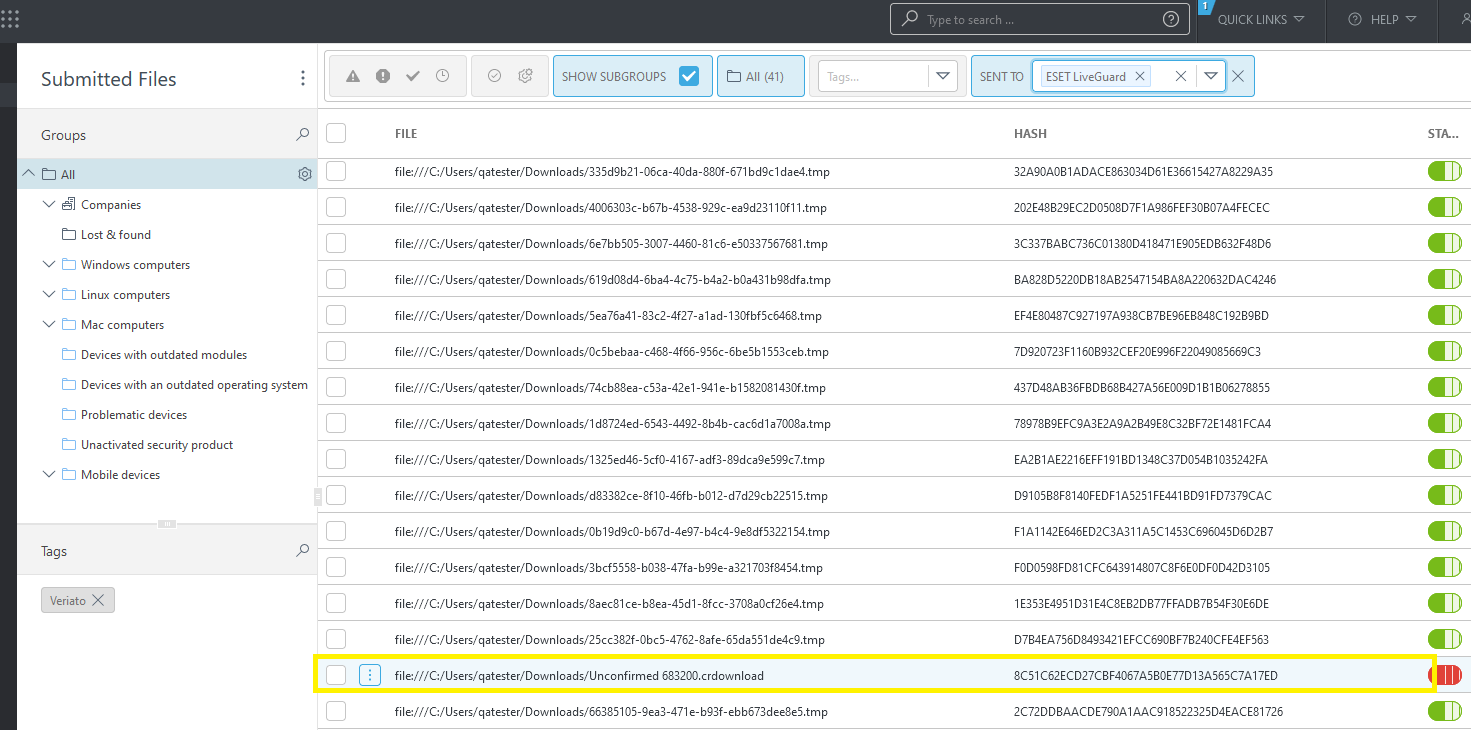
Click on three dots that are displayed.

- Select Create an Exclusion.
The New Exclusion panel appears. You are creating an exclusion for the Windows installer by its file hash.
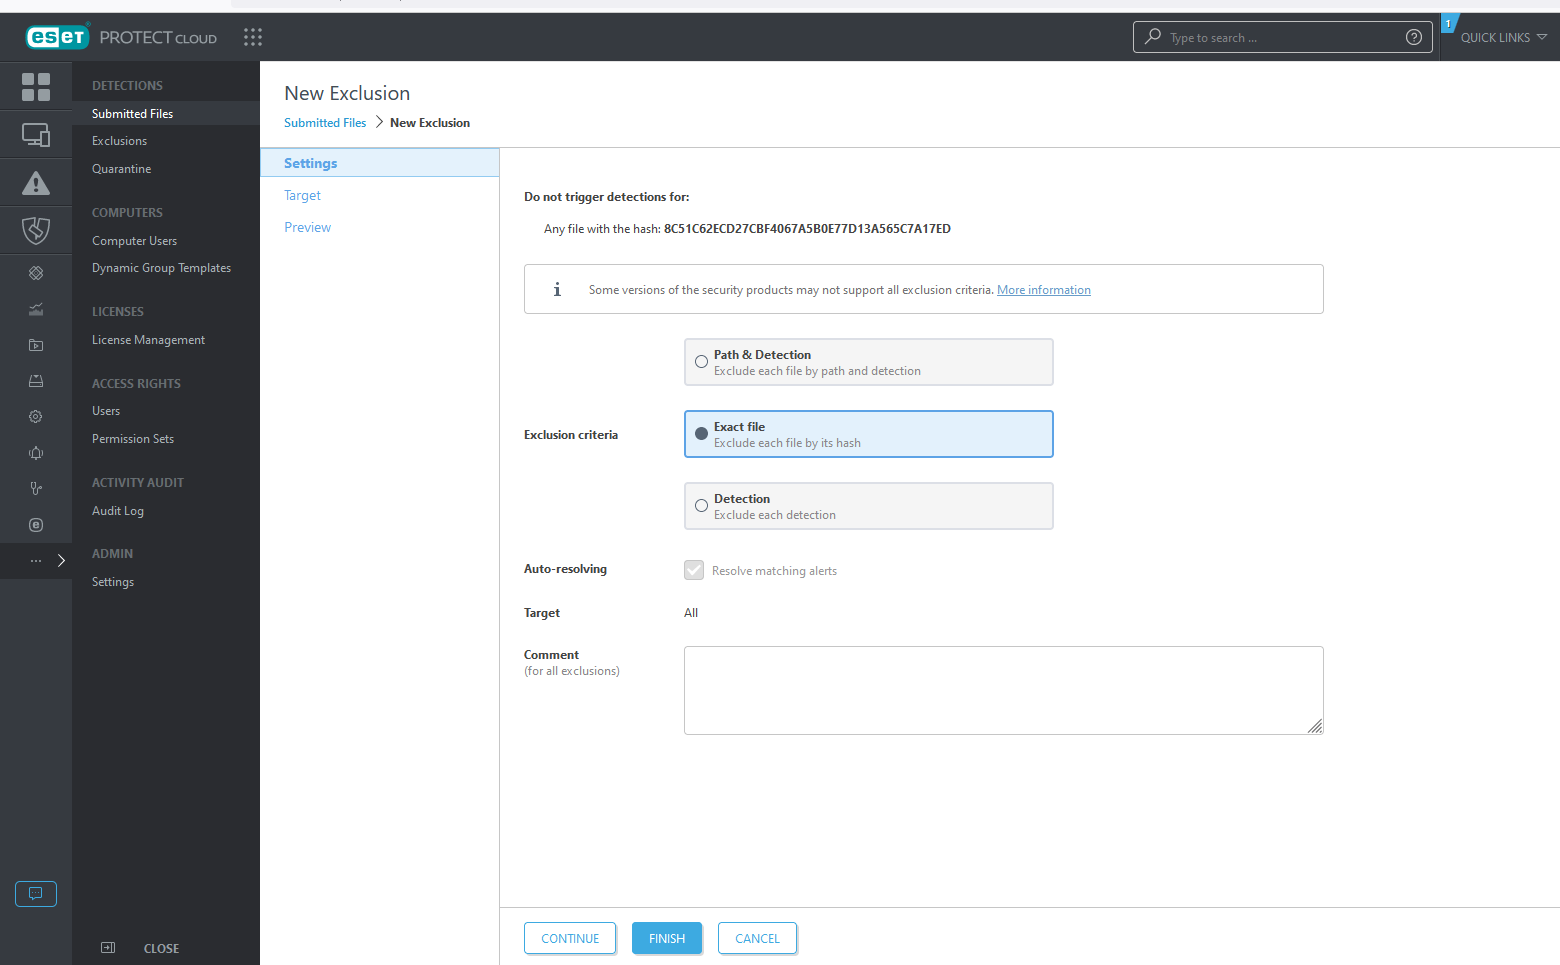
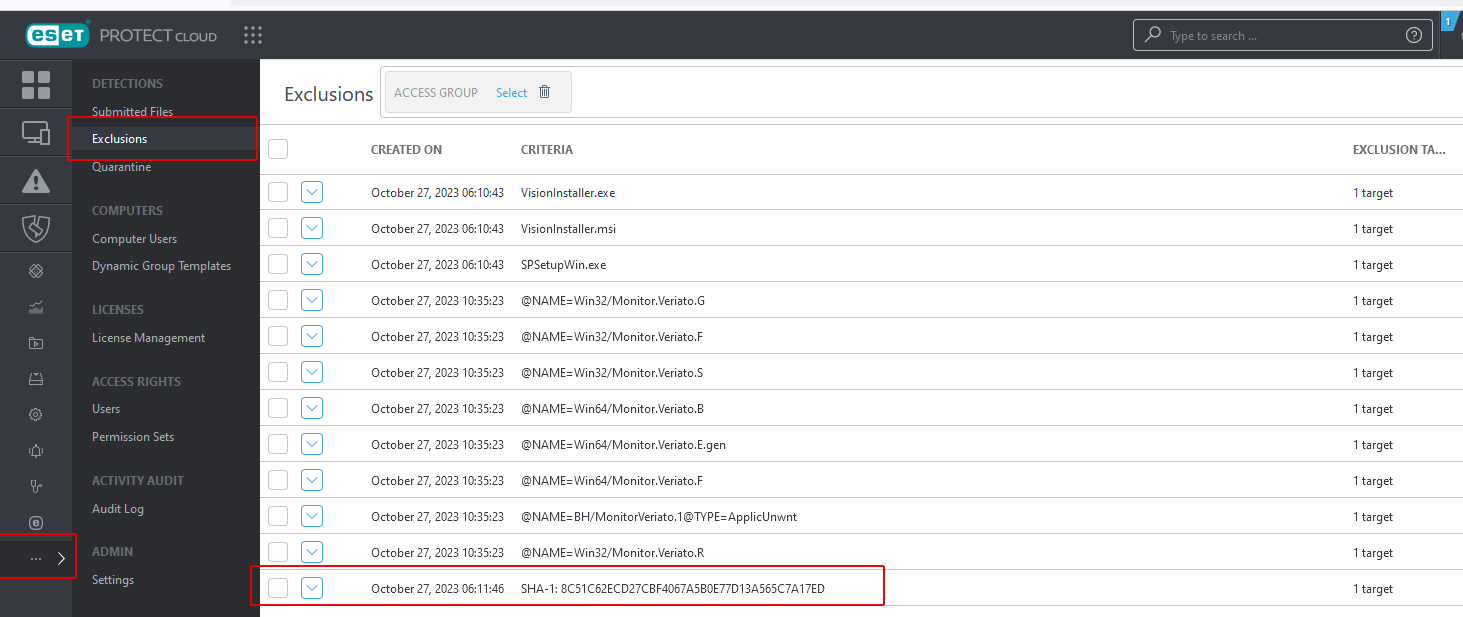
Click Finish to save the exclusion. - Return to Exclusions.
The hash exclusion is displayed under the file exclusions.
Download and install the agent
You should be able to successfully download the installer file and proceed with the installation on the workstation. When the ESET policy is applied to all workstations using ESET Endpoint Security, you network deployment should be successful.
Updated: 07/25/2024