Microsoft Defender Endpoint Security
Applies to: Agent version10.0.47390.40
Microsoft Windows Defender Endpoint Security provides antivirus protection for endpoints enrolled in Microsoft InTune. To exclude the Vision agent, you will need to create a policy in InTune and apply it to the Windows devices you plan to monitor. If you have not yet created groups in Microsoft Endpoint Manager, follow the instructions below before creating the exclusion policies.
Note: If the agent has been deployed to devices joined to Microsoft Endpoint Manager before you had a chance to set up exclusions, Windows Defender may have already found and blocked or cleaned the agent files. These devices would appear in Endpoint security | Antivirus | Active Malware. Create exclusion policies as instructed below and then re-install the agent.
Create Create an exclusion policy
- Log in to the Microsoft Office Home page.
You will need an Administrator account at https://www.office.com. - Select the Admin center from the left toolbar.
This loads the Microsoft 365 Admin Center.

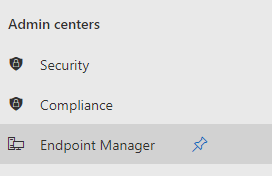
- Select Endpoint Manager
Press the … Show All menu on sidebar. Under "Admin centers" select Endpoint Manager. A new Windows Endpoint Manager admin center loads.
- Select Endpoint Security.
The Endpoint Security | Antivirus page loads.

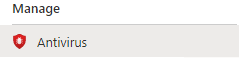
- Under Manage, select Antivirus.
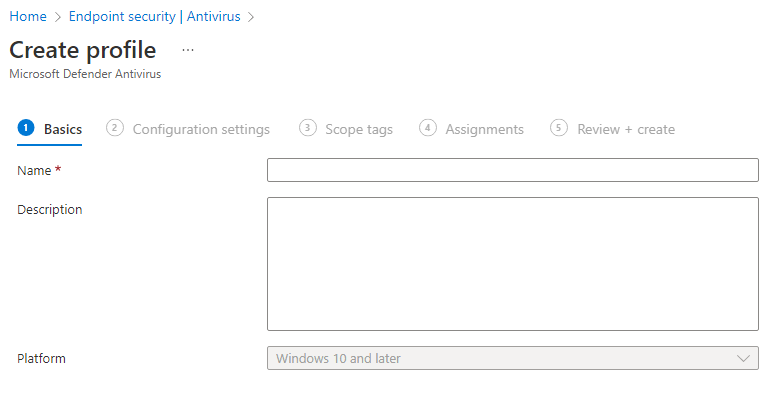
In the Summary section on the right pane, find the Antivirus policies section. You will create a new policy to configure the exclusions for Veriato Client and Server files. - Press + Create Policy to create a policy.
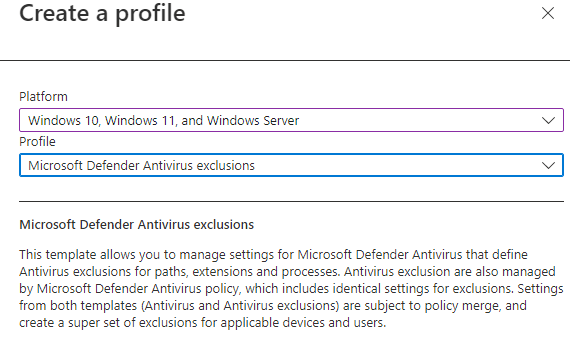
You are prompted to create a profile for the new policy. - Set up the policy's profile.
Select the Windows endpoint Platform for this policy and choose a Profile. The Microsoft Defender Antivirus exclusions profile targets only Microsoft Defender exclusions.
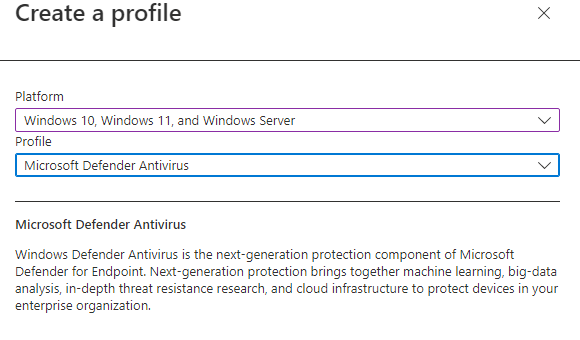
The Microsoft Defender Antivirus profile allows you to configure additional features for Microsoft Defender for Endpoint.
- Proceed to the Basics section.
Give your Veriato Server or Client policy a Name and Description.
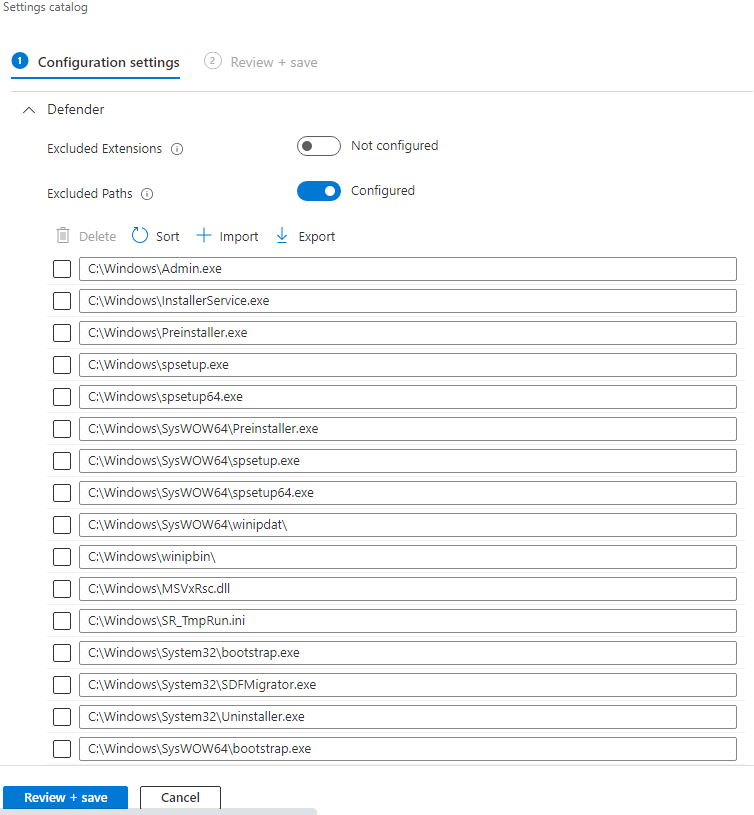
- Choose Configuration options.
- If you chose the Microsoft Defender Antivirus exclusions profile, you go directly to Excluded Paths and Processes.
- If you chose the Microsoft Defender Antivirus profile, review and enable options before entering exclusions.
For Excluded Paths, start with the following:
C:\Windows\winipbin-install
C:\Windows\winipbin
C:\Windows\SysWOW64\winipdat
C:\Windows\System32\winipdat
Use the complete lists below to create a .CSV file to import, if these exclusions are not sufficient.
- Select +Import to import an Excluded Paths list.
Navigate to and select your agent .csv file to populate Excluded Paths list. (The paths in the illustration below are not correct.)
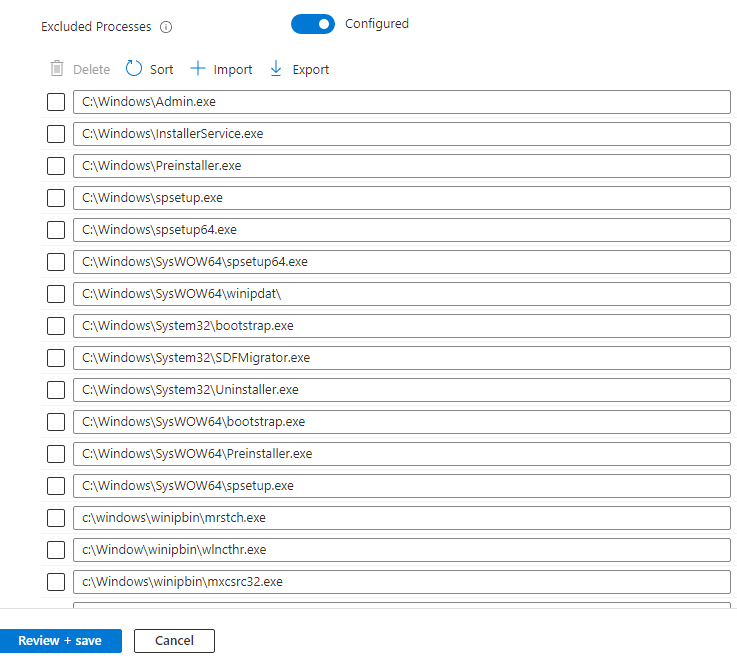
- For Excluded Processes, select +Import and import the same list.
To prevent detections, select same Client .csv file to populate the Excluded Processes list.
- Save your changes.
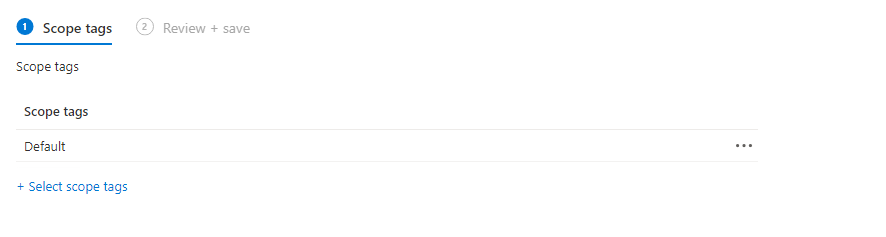
When both lists are loaded, press Review + save, and then press Save and Next. - Add Scope Tags, if applicable.
If you have no tags to add, choose Default and press Next.
- Assign the policy to Groups of endpoint devices.
Under Assignments, select a Group to apply the Veriato Server or Veriato Client exclusions. The Groups include devices enrolled in Intune and already added to an Endpoint Manager group (see below).
Client exclusionsClient exclusions
To avoid any future detection, copy and paste (or create an import .csv file) the following files to exclusions in your Client policy.
Note: If your Veriato Agent Recording Policy is set to use a custom binary folder or random file names (Fixed Filenames is unchecked) adjust the list of files accordingly.
Start by excluding the main folders to exclude:
C:\Windows\SysWOW64\winipdat
C:\Windows\System32\winipdat
C:\Windows\winipbin-install
C:\Windows\winipbin
If any detections are occuring, use the following lists.
Files to exclude during installation:
VisionInstaller.exe
C:\Windows\winipbin-install\SPSetupWin.exe
C:\Windows\winipbin-install\Config.txt
C:\Windows\winipbin-install\spsetup.exe
C:\Windows\winipbin-install\SR_TmpRun.ini
C:\Windows\winipbin-install\spsetup.log
C:\Windows\winipbin-install\SPSetup64.exe
C:\Windows\winipbin-install\Admin.exe
C:\Windows\winipbin-install\MSVxRsc.dll
C:\Windows\winipbin-install\SPSetup64.log
C:\Windows\winipbin-install\ra.dll
C:\Windows\winipbin-install\crbundl\crx618031\icons\icon16.png
C:\Windows\winipbin-install\crbundl\crx618031\manifest.json
C:\Windows\winipbin-install\crbundl\crx618031\src\bg\spbackground.js
C:\Windows\winipbin-install\crbundl\crx618031\src\content\spcontent.js
C:\Windows\winipbin-install\crbundl\crx618031\src\content\splocal.js
C:\Windows\winipbin-install\crbundl\crxsource.zip
For Windows x86 devices, add the following
C:\Windows\winipbin-install\UUU4BAA.tmp
C:\Windows\winipbin-install\UUU5551.tmp
C:\Windows\winipbin-install\UUU5530.tmp
C:\Windows\winipbin-install\crbundl\crx89312\icons\icon16.png
C:\Windows\winipbin-install\crbundl\crx89312\manifest.json
C:\Windows\winipbin-install\crbundl\crx89312\src\bg\spbackground.js
C:\Windows\winipbin-install\crbundl\crx89312\src\content\spcontent.js
C:\Windows\winipbin-install\crbundl\crx89312\src\content\splocal.js
For Windows x64 and x86 devices during installation
C:\Windows\winipbin\dosudweb32.dll
C:\Windows\winipbin\support.crx
C:\Windows\winipbin\support.xml
Files and Processes to Exclude
C:\Windows\winipbin\bissima.dll
C:\Windows\winipbin\bissimo.dll
C:\Windows\winipbin\cmproxfr.dll
C:\Windows\winipbin\eanipw.dll
C:\Windows\winipbin\hdaocogema.dll
C:\Windows\winipbin\jlyfftin.dll
C:\Windows\winipbin\lrdfcndr.dll
C:\Windows\winipbin\mossimo.dll
C:\Windows\winipbin\mrstch.exe
C:\Windows\winipbin\mxcrsc32.exe
C:\Windows\winipbin\prsthasn.exe
C:\Windows\winipbin\quasima.dll
C:\Windows\winipbin\quasimo.dll
C:\Windows\winipbin\rcxaemap.dll
C:\Windows\winipbin\supportch.crx
C:\Windows\winipbin\supportch.xml
C:\Windows\winipbin\supported.appx
C:\Windows\winipbin\supportf.xpi
C:\Windows\winipbin\svrltmgr.dll
C:\Windows\winipbin\svrltmgr64.dll
C:\Windows\winipbin\svrltwp.dll
C:\Windows\winipbin\svrltwp64.dll
C:\Windows\winipbin\vdorctrl.dll
C:\Windows\winipbin\wdwwsm.dll
C:\Windows\winipbin\wesnthelf.dll
C:\Windows\winipbin\wlcnthr.exe
C:\Windows\winipbin\wzodlg32.dll
As you configure users and groups, the following file will be duplicated with different numbers appended, representing your group policies. If possible, use a wildcard exclusion:
C:\Windows\winipbin\wzodlug\wzodlg32_59824.dll
C:\Windows\winipbin\wzodlug\wzodlg32_*.dll
C:\Windows\winipbin\yamjrd.dll
C:\Windows\winipbin\zrgrshwin.dll
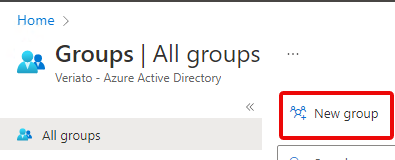
Creating a group in Endpoint ManagerCreating a group in Endpoint Manager
- Create a New Group.
From the left sidebar of Microsoft Endpoint Manager Admin Center, select Groups.
Press New Group.
- Set up a Security group.
For Group type, select Security.
Enter a Group name and description.
For Membership type, select Assigned. - Select group members.
Press the No members selected link and type a device name in the Search input box. Continue to search for and add the devices that will belong to this group.
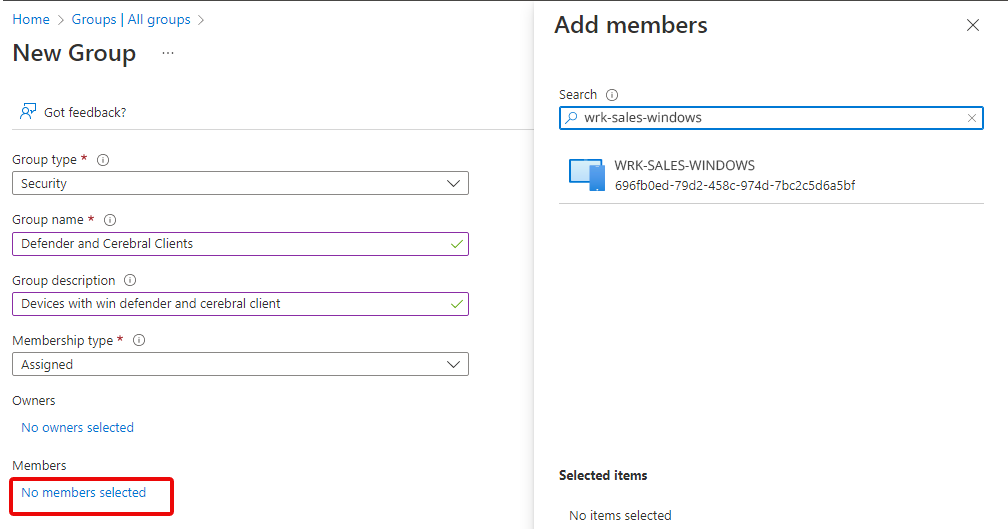
- Press Create to create the group.
You can now assign your Interguard exclusion policy to the group.
Updated: 07/25/2024