Remote Install With NetDeploy
Applies to Windows Agents Only
Prerequisites
NetDeploy can run on any Windows machine connected to the Active Directory Forest or the local network where target devices located. Prerequisites for deployment are as follows:
For the machine you are deploying from:
- You must be logged into Windows with full Domain Administrator credentials with permissions to install software on all machines you wish to deploy to.
- Download the “Silent Installer” from Admin | Download Agents in the app and have it accessible.
- Unblock the Silent Installer file. Before deploying, take steps to unblock the Windows file so that it won't be stopped by Windows security. See Windows Installation.
For the machines you are deploying to:
- Windows Computers must be powered ON with a valid domain connection and can be “pinged.” A user does not need to be logged into Windows for deployment to succeed.
- Antivirus exclusions should be in place for the software you use, and if additional antivirus or anti-malware is installed on the endpoint, make sure the software has exclusions or is disabled. See Antivirus Exclusion Guides.
Running NetDeployRunning NetDeploy
- Download and extract the NetDeploy package .zip file.
Click here to download. - Find and right-click the Netdeploy.exe file and choose to “Run as Administrator.” If you get a warning from Microsoft Security, select More Info and choose to Run Anyway.
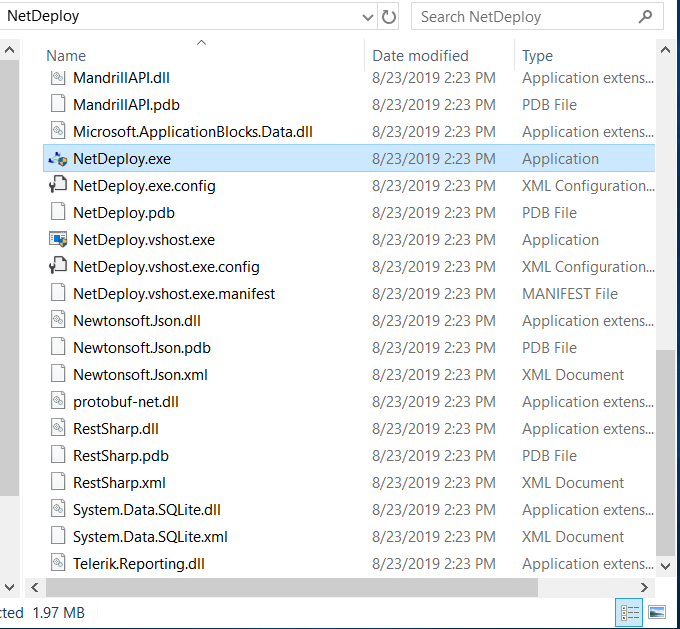
Figure 1: Run NetDeploy - After launching the NetDeploy application, you are prompted to select either an available Active Directory or Local Network to scan for available machines (see Figure 2).
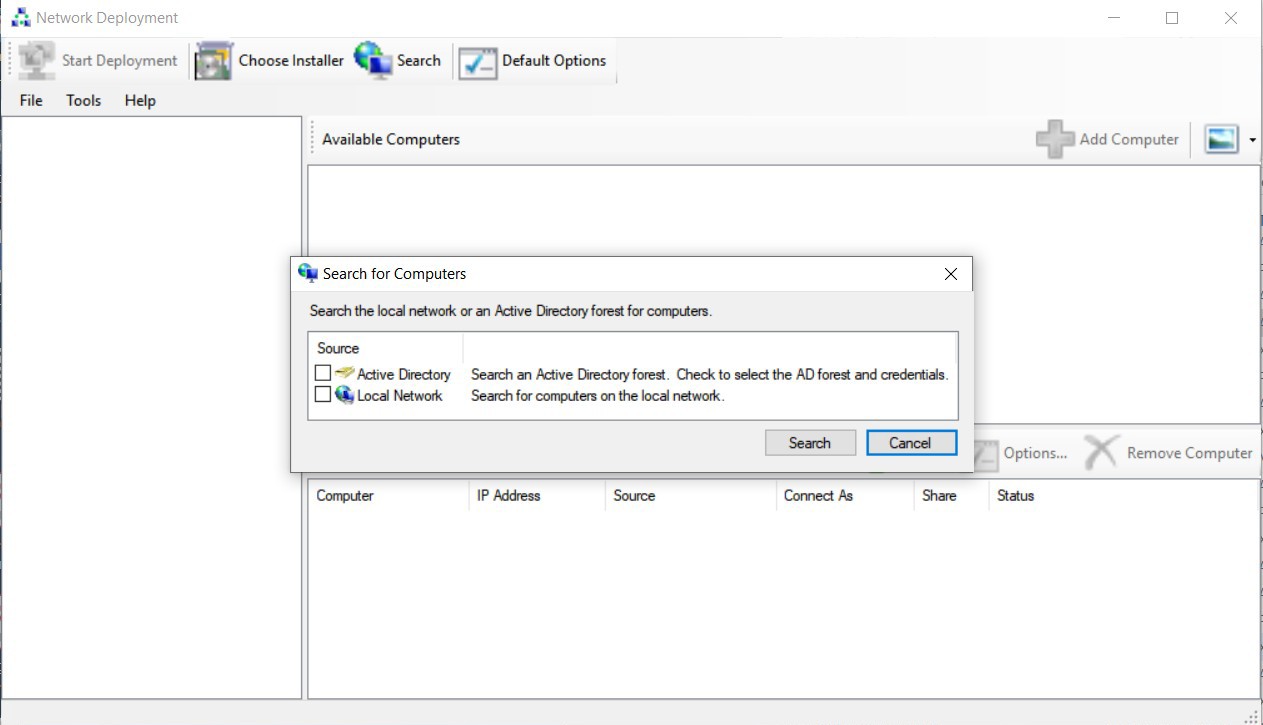
Figure 2: The NetDeploy window
Selecting computers from Active DirectorySelecting computers from Active Directory
To find available devices in an Active Directory Forest:
- Select Active Directory.
In the Search for Computers dialog, select Active Directory. The Active Directory Options dialog opens showing your current credentials. - Provide credentials and select the forest.
If your login is associated with the AD domain you wish to access, check Use current forest.
If you need to switch to switch to domain administrator credentials or access a different domain, uncheck Use current credentials and supply new ones. Then check Use current forest.
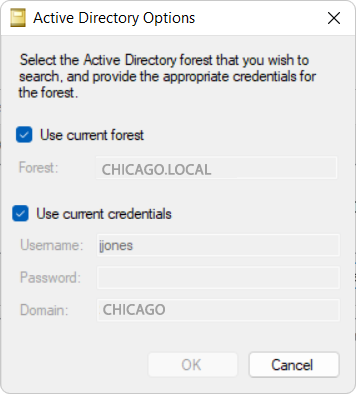
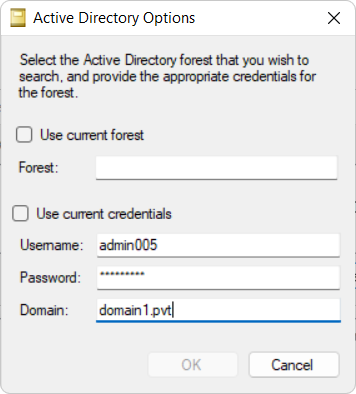
Figure 3: Active Directory Options
- Search Active Directory for the forest.
Once the credentials are authenticated for the AD domain, press Search, and wait for NetDeploy to find groups and OUs.
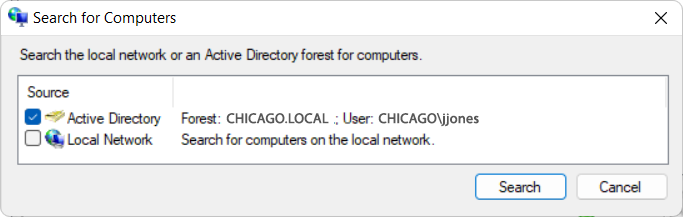
Figure 4: Connected to an Active Directory domain - Expand the Active Directory tree.
The NetDeploy window is now populated with the Active Directory domain in the left column. Expand the left-column tree to view groups. (A user group will not contain computers.) - Select a folder.
Select a left-column folder to view its computers in the upper right pane. - Select “Available Computers” to add to “Selected Computers.
Select a computer in the upper right pane and press Add Computer to add it to the lower pane.
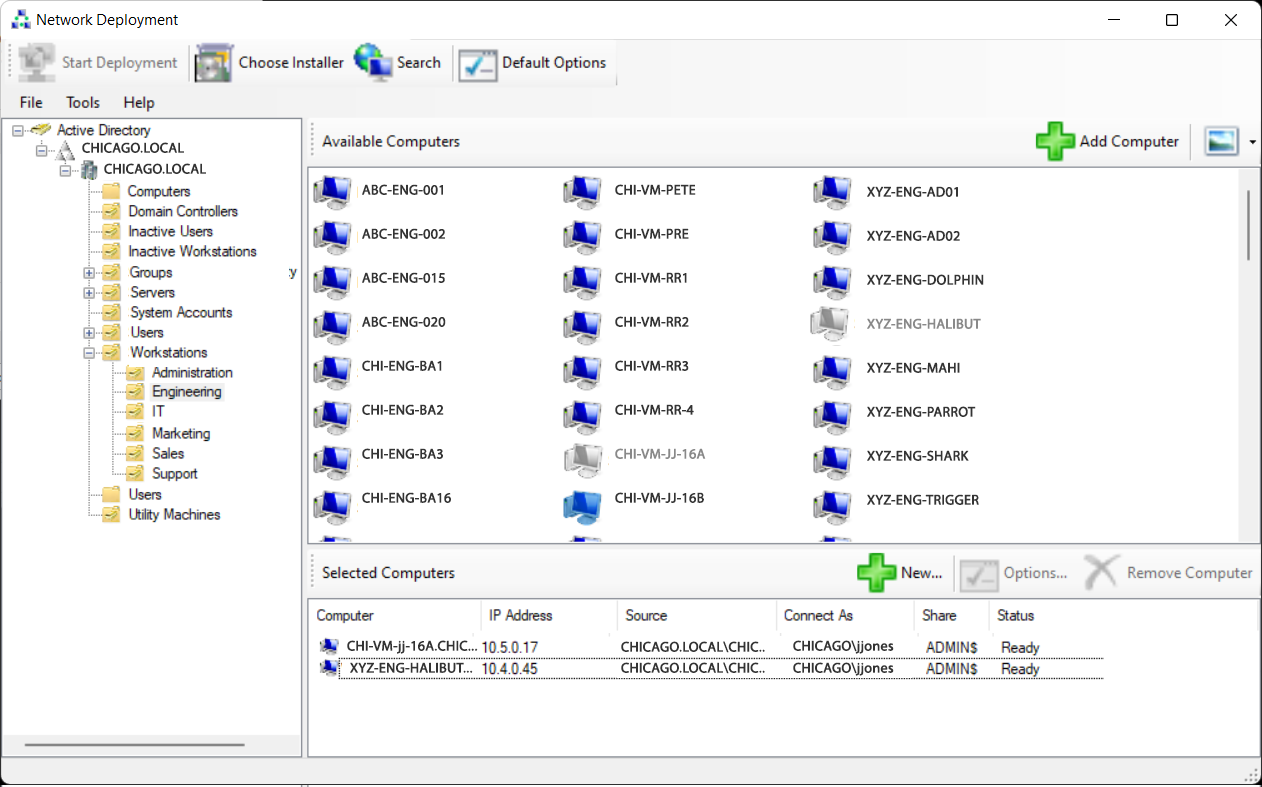
Figure 5: Selecting from Active Directory in NetDeploy
Or drag-and-drop computers from the upper to the lower pane.
Or, manually add a computer by pressing + New above the lower pane.
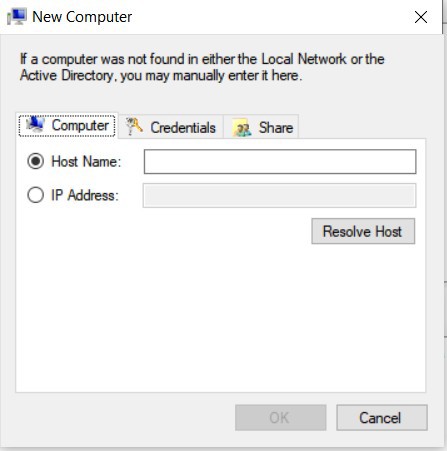
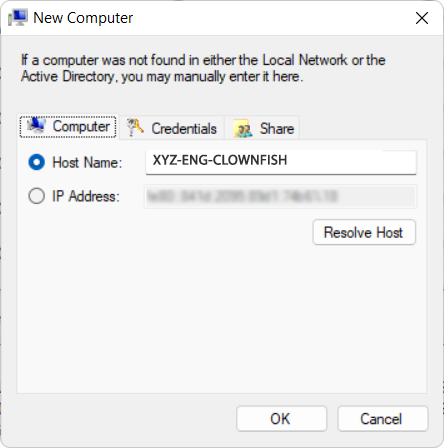
Figure 6: Manually add a computer.
- Enter the Host name or the IP address and press Resolve Host.
- If necessary, select Credentials and supply different credentials.
- If necessary, select Share and change the type of Share used (default is ADMIN$).
- Once the computer is selected, click OK.
Changing the share for deploymentChanging the share for deployment
Computers added to “Selected Computers” display identifiers. By default, NetDeploy uses the available Admin$ (Admin sharing) on the client. If the endpoint device does not have this feature enabled by default, you can change the share.
- Select a computer in “Selected Computers” and press Options above the lower pane.
- Select the Share tab.>
- Uncheck Use Default Share. Choose a new share and click OK.
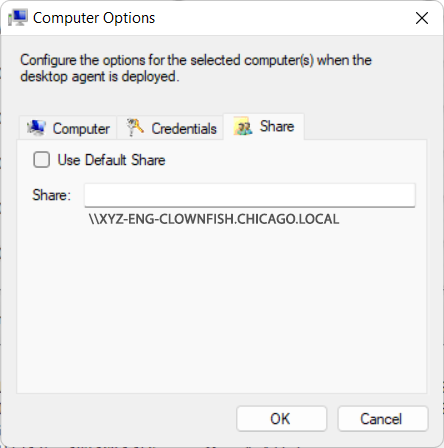
Figure 7: Changing the share before deployment
Deploying the agent to selected computersDeploying the agent to selected computers
Once you have computers selected for agent installation, choose your downloaded agent installer.
NOTE: The installer file may be blocked by local Windows Security. Take steps to unblock the file you haved downloaded before deploying it to endpoints. See Windows Installation: Unblock the downloaded installer file.
- Choose the Installer.
Press Choose Installer at the top of the NetDeploy window. - Browse to and select your downloaded Silent Installer.exe file.
A Silent Installer always has the word “silent” in the filename to distinguish it from other local installers. Be sure to select the Silent Installer. Press OK.
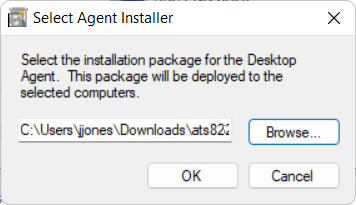
Figure 8: Select the installer - Start the deployment.
Press Start Deployment at the top of the NetDeploy window. This begins the process of pushing the software to the selected machines.
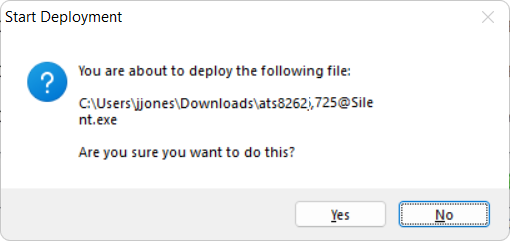
Figure 9: Confirm deployment
Wait until NetDeploy returns either a success or failure message. If deployment is successful, a green check mark appears next to the host name in NetDeploy.
- Verify deployment.
Next, log in to your Veriato Vision app to confirm a newly deployed device appears in Admin | Endpoint Agents. Refer to the next section if NetDeploy returns red failure notices.
Successful deployment – Agent is "Not recording"Successful deployment – Agent is "Not recording"
If deployment is successful, a green checkmark appears next to the host name in NetDeploy. NetDeploy can verify successful file transfer and execution of the installer; however, it cannot verify the agent starting, checking in, or registering the initial “base” license.
To verify successful installation, login into Veriato Vision and go to Admin | Endpoint Agents.
- All – The device will appear in this list if the agent is successfully installed.
- Not Recording – If the device restarted following agent installation and no one has logged in, or a logged in user has not been assigned a recording policy, the device appears in Not Recording. A user needs to login and receive a recording policy (individually or by being assigned to a group) before the agent begins returning data.
- No Check-in - If the endpoint device never produces a check-in date/time, follow the steps below.
Successful deployment - Agent does not appearSuccessful deployment - Agent does not appear
If NetDeploy marked the installation successful (green) for a computer, but the computer name is not appearing in Endpoint Agents, check for:
- Is the device online?
When a device is turned on with a valid internet connection, it should register it should register with the server and receive its base license within 5-10 minutes of installation. It will also continue to attempt registration every one minute indefinitely. Make sure the device is switched on and has internet access. - Reboot the device.
Do this remotely using the CMD prompt or go to the endpoint and manually restart it. Once the computer boots back into Windows check the app again to see if the computer name appears under Endpoint Agents. - Try the hotkey sequence at the endpoint computer.
The “hot key” sequence is unique to your account is found on the Admin | Company Account page. When the agent successfully installed, the hotkey sequence brings up a password prompt. Enter your Veriato Vision password. If the client is not registered, a message informs you: “This product is not yet registered.” If the status panel shows the agent not recording, the user needs to be assigned to a group with a recording policy. Figure: Agent is installed but not recording - Check antivirus.
After the client software installs and registers in Veriato Vision, it should immediately start to check-in with ATI’s servers. If the client never produces a check-in date and time after a reboot and log into Windows with a valid internet connection, further troubleshooting will be required. If Antivirus software has quarantined the software, a check-in time may never appear, or the client stops checking in.
Troubleshooting: Check antivirus exclusionsTroubleshooting: Check antivirus exclusions
For some antivirus software, folder exclusions must be added prior to installing the software. If antivirus software quarantines the software, installation may fail, or an installed agent cannot check in or will stop checking in. When antivirus removes folders/files, the client is inoperable. Check our Antivirus Exclusion Guides to learn what types of exclusions (or firewall settings) may be necessary for your specific product. Once exclusions are set, you will need to re-deploy the software.
Troubleshooting: Failed DeploymentTroubleshooting: Failed Deployment
If the deployed package fails to install on the remote device, NetDeploy returns a red X designating the failed installation. Details on the specific error message are important to finding a resolution to the issue.
- Cannot resolve host path.
This error is returned when NetDeploy cannot resolve the computer name or IP address on the domain. Make sure that the computer is powered on and can be “pinged” when deployment is attempted. If the computer cannot be pinged, it cannot be deployed to. Once the computer is available on the network, attempt deployment to it again. - Cannot use default Admin$
By default, NetDeploy attempts to use the Admin$ (Administrative Share) for deploying the agent installer package. If this Share is not enabled on the target device, this error is returned. You can change the Share:
- Highlight the computer and select the Options button.
- Select the Share tab.
- Deselect the Use Default Share checkbox. You can now change the Share that NetDeploy uses to one known to the device.
Alternatively, you can take the Installer .exe file to endpoint device, log into the computer as an Administrator, and run the installer locally at the computer.
Updated: 01/23/2023