Screenshots by Application
Smart Screenshots trigger screenshots when a user opens an application or accesses a website URL. This allows you to take a screenshot of the user's desktop on specific activities when Continuous Screenshots are not being used. You can use different Recording Policies for different groups to call attention to unusual or unacceptable programs being used, and review the context of the event.
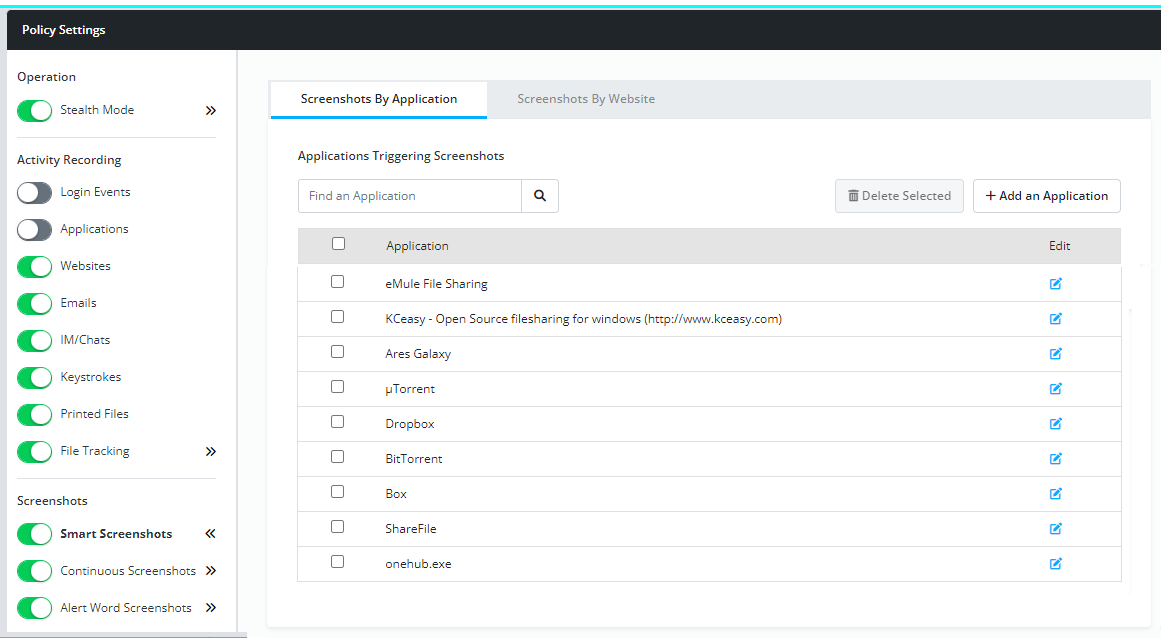
To trigger screenshots
- Switch on Smart Screenshots.
Open its right-panel settings. - Select Screenshots by Applications.
Press Add an Application and select one or more applications.
To edit entry already added, click the edit icon.
To delete an application already added, select it, press Delete Selected (confirm your deletion). - Set the screenshot frequency and duration.
The default values are a screenshot every 30 seconds while the application is open for an Unlimited duration. (Set at the bottom of the Add an Application panel.)
What is captured
View the screenshots in Data Explorer under the Screenshots tab (or under Applications).
If a notification watches for Smart Screenshots by user (User Behavior), the notification is counted in User Behavior Notification Alerts.
- Screenshots - When a specified application (e.g., PC teams.exe or Mac Terminal) is launched, screenshots begin.
- Screenshot frequency and duration - the screenshots continue according to the set frequency (the default - one every 30 seconds, as many as one every 5 seconds, or as few as one every 10 minutes). Screenshots continue at the set frequency for a duration of 30 seconds or until the application is closed ends (unlimited).
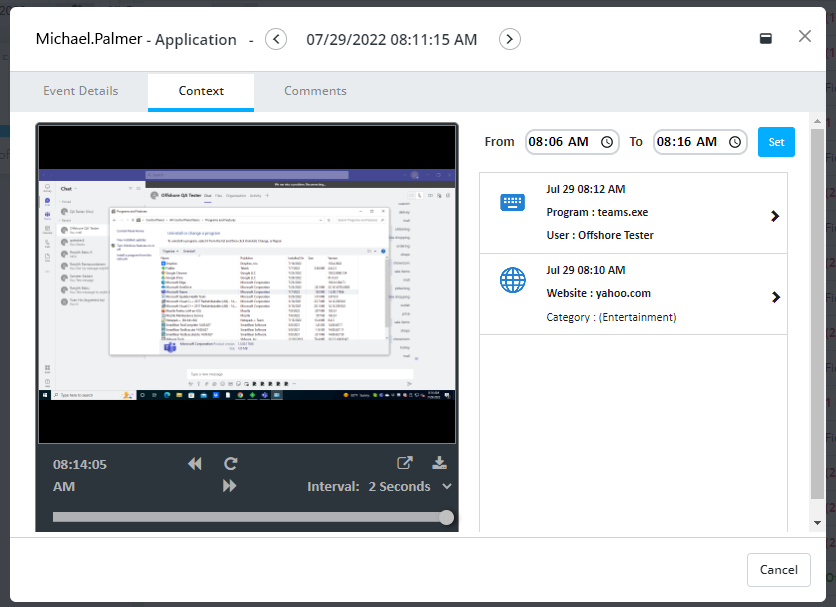
- Application Events - The screenshots are added to the Application event's Context tab. Event details include the user (sometimes), the device name, date and time, duration of activity, and application name.
Browse application types to add Browse application types to add
- Select Screenshots by Application.
To edit a program already added, click the edit icon.
To delete a program already added, select it, press Delete Selected and confirm your deletion.
To add a program, press Add an Application. - Press Add an Application.
Commonly known applications are listed under + Browse Application Types.
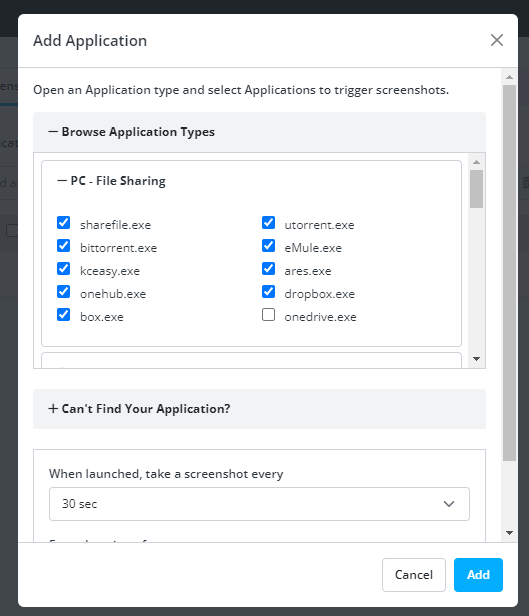
- Open and browse +Application Types.
Scroll through the application types. Both Windows OS (PC) and Mac OS types are listed. Click plus to open a type and view provided application names.PC - Web Browsers
PC - Email
PC - IM/Chat
PC - Screen Sharing
PC - Remote Access
PC - Password Crackers
PC - Steganography (encryption) Tools
PC - Invoicing
PC - Electronic Health Record
PC - Gaming
PC - Time Fraud (e.g., Caffeine, Mouse Mover)
PC - Gambling
Mac - Web Browsers
Mac - Email (e.g., Outlook, Apple Mail)
Mac - IM/Chat
Mac - Media Players
Mac - File Sharing
Mac - Multimedia
Mac - Productivity Tools
Mac - Misc (Finder, App Store, Terminal, etc.)
Can't find your application?Can't find your application? Search or enter to add
If the application you want is not listed, enter its name.
- Open + Can't Find Your Application?
- Type a name in the Application entry field.
For example, start typing "Acrobat." Known matches to your entry are displayed, and you can select one. If no matches are displayed, make sure the executable name is correct and leave the entry as is.Find an application 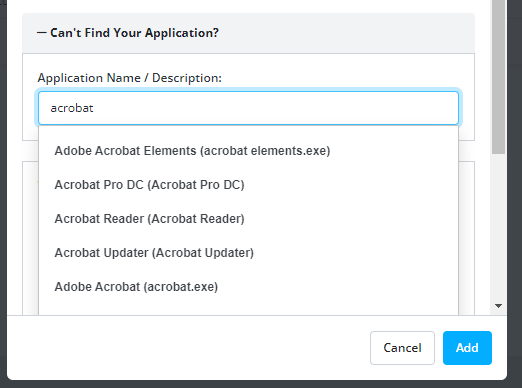
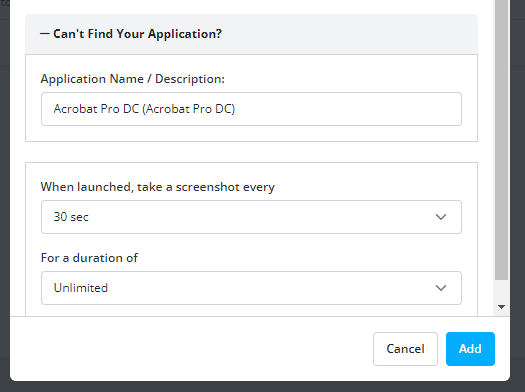
Set screenshot interval and durationSet screenshot interval and duration
The default values are a screenshot every 30 seconds while the application is open for an Unlimited duration. At the bottom of the Add an Application panel, change the values for more or fewer screenshots.
- When launched, take a screenshot every - Choose one screenshot every 5 seconds (most frequent - more screenshots) to one screenshot every 10 minutes (most infrequent - fewer screenshots).
- For a duration of - Choose 30 seconds (shortest screenshot duration) to Unlimited (continue screenshots as long as the application is open).
Updated: 07/25/2024