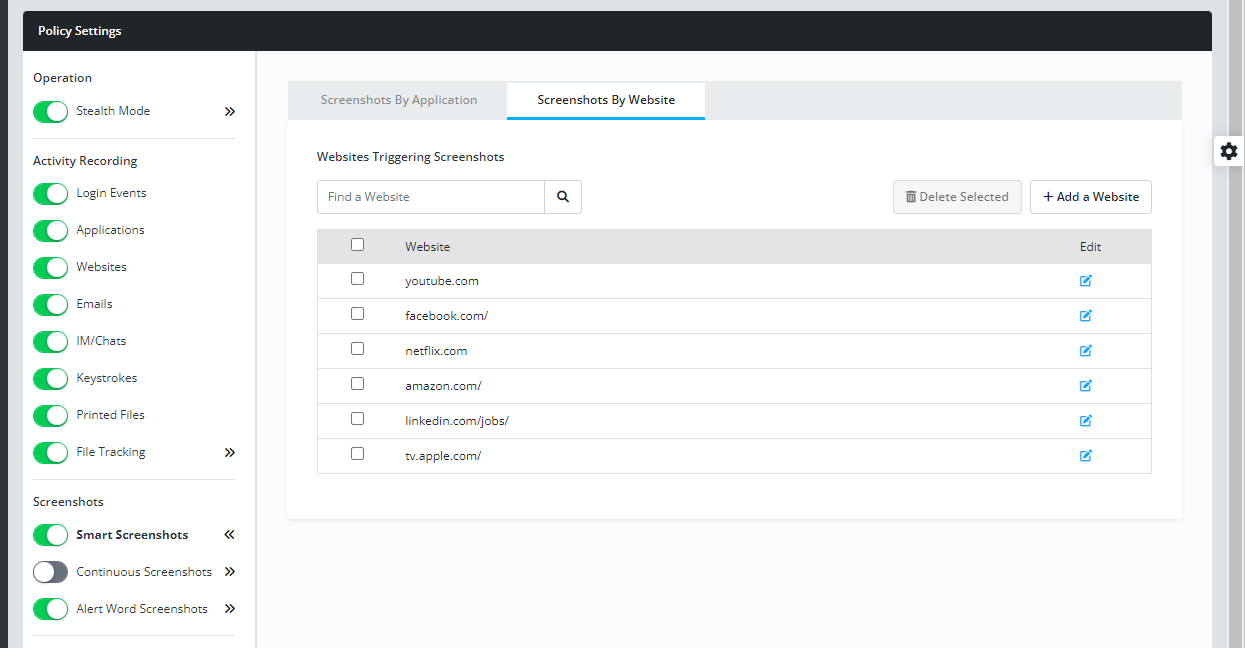
Screenshots by Website
Smart Screenshots trigger screenshots when a user opens an application or accesses a website URL. This allows you to take a screenshot of specific activity when Continuous Screenshots are not being used. Use different Recording Policies for different groups to call attention to unusual or unacceptable use and review the context of the event.
To trigger screenshots
- Switch on Smart Screenshots.
Open its right-panel settings. - Select Screenshots by Website.
Press Add a Website and select one or more sites.
To edit entry already added, click the edit icon.
To delete websites already added, select them, and press Delete Selected (confirm your deletion). - Set the screenshot frequency and duration.
The default values are a screenshot every 30 seconds while the application is open for an Unlimited duration. (Set at the bottom of the Add a Website panel.)
What is captured
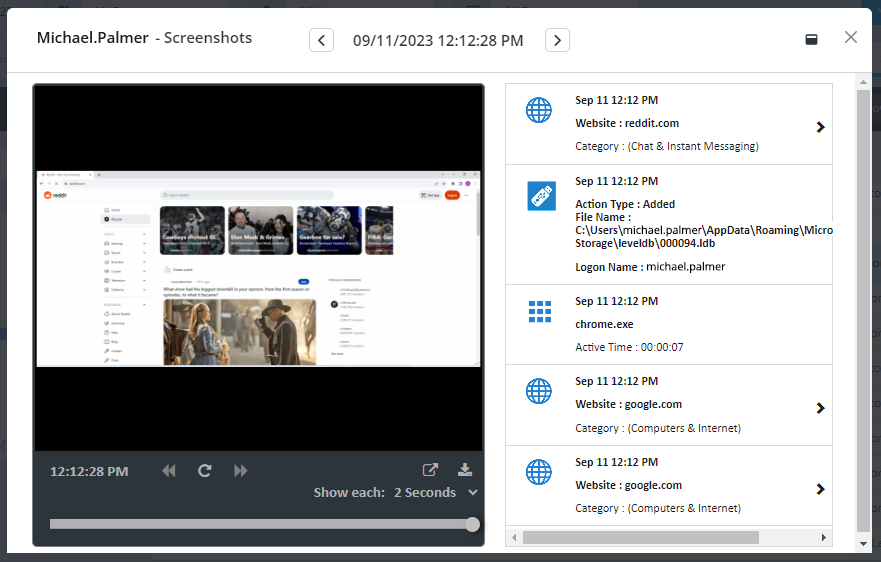
View the screenshots in Data Explorer under the Screenshots tab (or under Websites).
If a notification watches for Smart Screenshots by user (User Behavior), the notification is counted in User Behavior Notification Alerts.
- Screenshots - When a specified website URL (e.g., https://www.amazon.com or Mac Terminal) is launched, screenshots begin.
- Screenshot frequency and duration - the screenshots continue according to the set frequency (the default - one every 30 seconds, as many as one every 5 seconds, or as few as one every 10 minutes). Screenshots continue at the set frequency for a duration of 30 seconds or until the application is closed ends (unlimited).
- Website Events - The screenshots are added to the Context tab on screenshots for the user and on the website event. Event details include the user name, the device name, date and time, duration of activity, and website address.
Screenshots by websiteScreenshots by website
Trigger screenshots when a specific website is accessed from the Recording Policy. Select Configuration | Groups & Policies | Recording Policies and Add or Edit a policy.
- Switch on Smart Screenshots and open its right-panel settings.
- Under Screenshots by Website press Add a Website.
To edit a website already added, click the edit icon.
To delete a site already added, select it, press Delete Selected and confirm your deletion. - Enter the webiste name.
Copy and paste the website URL. You can enter a domain name (instagram.com) or the complete URL.

- Under When launched, take a screenshot every select the screenshot frequency.
- Under For a duration of select the period to continue taking screenshots.
- Press Add. You return to the policy settings where each website you selected is listed.
Updated: 07/25/2024