Reporting - Exports
Exports are typically larger collections of data. Use Exports to integrate the data with other tools and ot save data beyond your Data Viewing period (refer to Company Account). When a Scheduled Export completes, an email notification is delivered the Recipients listed in the Scheduled Export profile. You'll need to log in to the Interguard app to download the Export file.
- Set up and schedule exports from the Reporting | Scheduled Exports tab.
- View or download exports from the Reporting | Recent Exports tab.
- Exports are not retained beyond the Data Viewing period, so be sure to download them when you receive notification.
TIP: To export past data, set the report to run Immediately and then select a date range.
Scheduled and Recent Exports include ALL exports requested by your app users.
- To sort the grid - Click on column header.
- To find Scheduled Exports - Under the Name or Last Edited column head, begin typing and click the filter filter symbol. Or simply click the filter symbol to select your criteria.
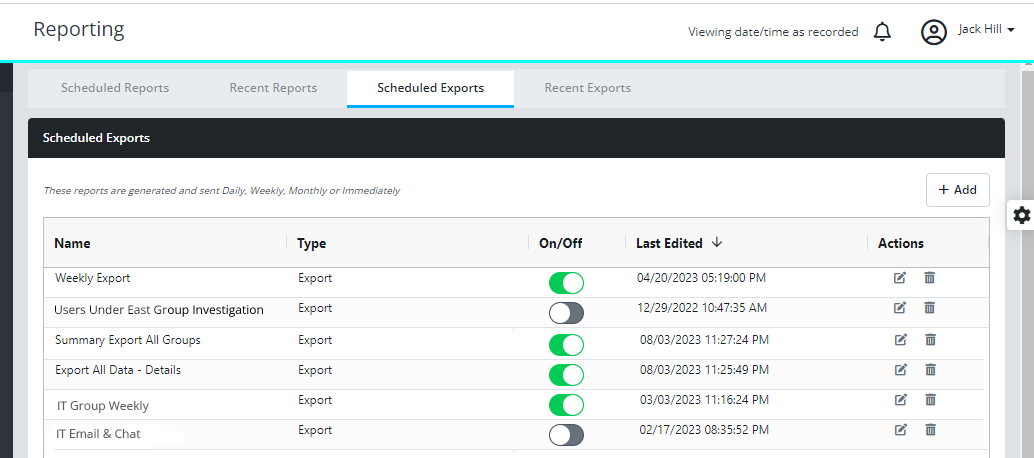
Scheduled ExportsScheduled Exports
The Scheduled Exports panel displays these columns. See below for instructions on Adding an export.
- Name - (Click to sort by) Name of the requested export.
- Type - Detail or Summary Export.
- On/Off - (Click to sort by) If ON, the export runs at the specified frequency - Monthly, Weekly, or Daily. ("Immediately" runs only once.)
If OFF the Export profile remains in the list but does not run. - Last Edited - (Default sort order - descending) The date and time the export was requested.
- Type - A Detail or Summary export.
- Actions - You can Edit edit or Delete trash any scheduled export.
Recent ExportsRecent Exports
The Recent Exports tab shows past exports and the dates they were Requested or Completed. If an export is Completed and can be viewed, press the view eye icon to view it. If it can be downloaded, press the download download icon.
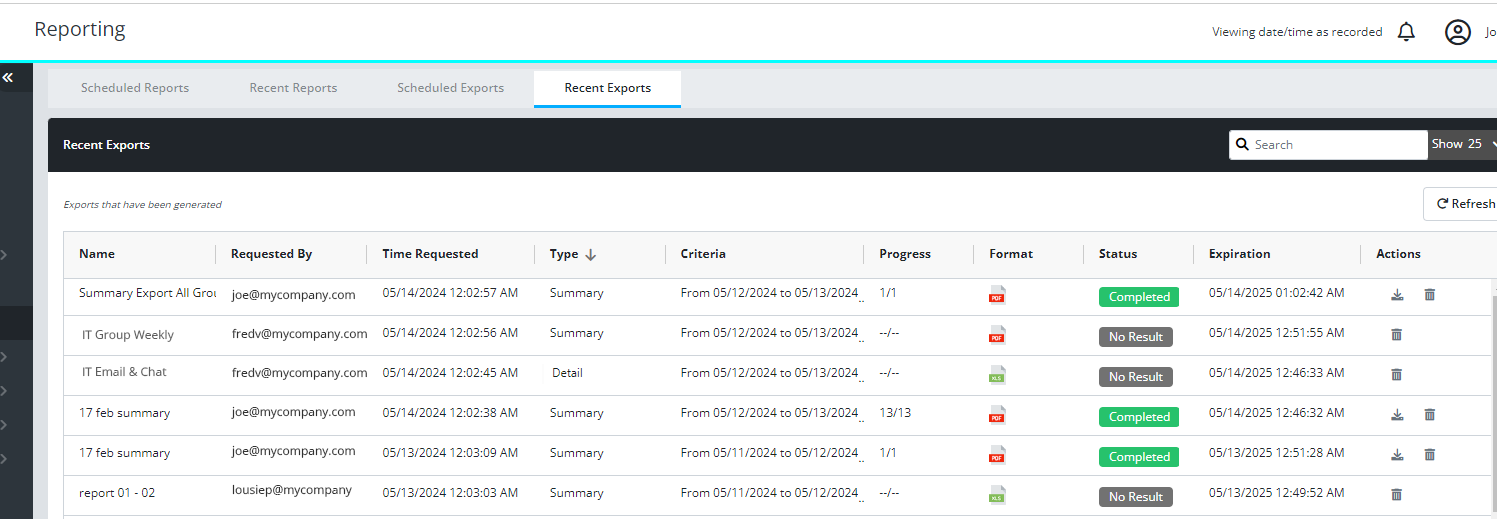
Recent Exports - The panel shows:
- Name - Name of the requested export.
- Requested by - Which Interguard login requested the export.
- Time requested - (Default sort order, descending) The date and time the export was generated.
- Type - Whether it was a Detail or Summary export.
- Format - Whether it was a PDF or CSV export.
- Criteria - The dates covered by the export.
- Progress - How many requested exports were successfully completed (for example, none --/-- or all 24/24).
- Status - The export has been Requested, Processing, Completed, or ended in No Result (there was no data matching the selected Data Types, Groups/Users, or Dates).
- Expiration - The date the export expires and is no longer available. Due to the size of exports, they cannot be stored by the app indefinitely. Download the exports you want to archive.
- Download - Press the download download icon to download the export file.
If the file has expired, a message appears:

NOTE: Keep in mind that most data views allow you to export the data shown to .CSV and/or .PDF files.
Add an exportAdd an export
Press Add to define a new Export or click Edit next to an existing scheduled report. The Report wizard opens.
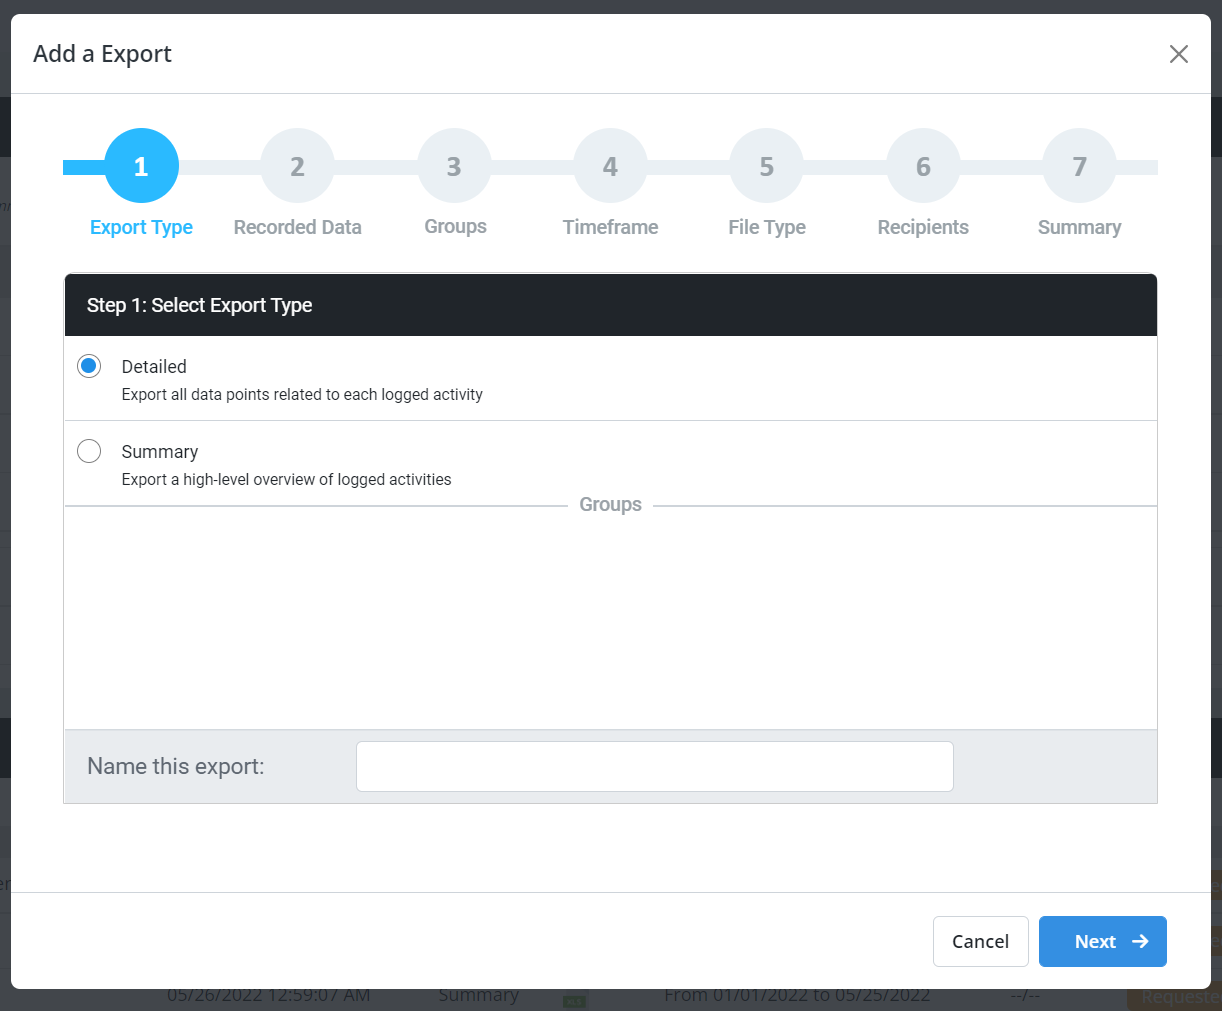
Step 1: Select an Export Type:
- Detailed - Exports all data points related to each logged activity. The scope is the entire data set, filtered by your Recorded Data, Group, and Timeframe selections.
- Summary - Exports a high-level overview of logged activity. The scope is the same as Detailed but the presentation is an aggregated overview.
- Name this export - Type a name in the field at the bottom of the panel and press Next.
Step 2: Select one or more recorded data types. Detailed and Summary offer different choices (see each export type below).
Step 3: Select Groups and/or individuals to report on. To include all users, select every group.
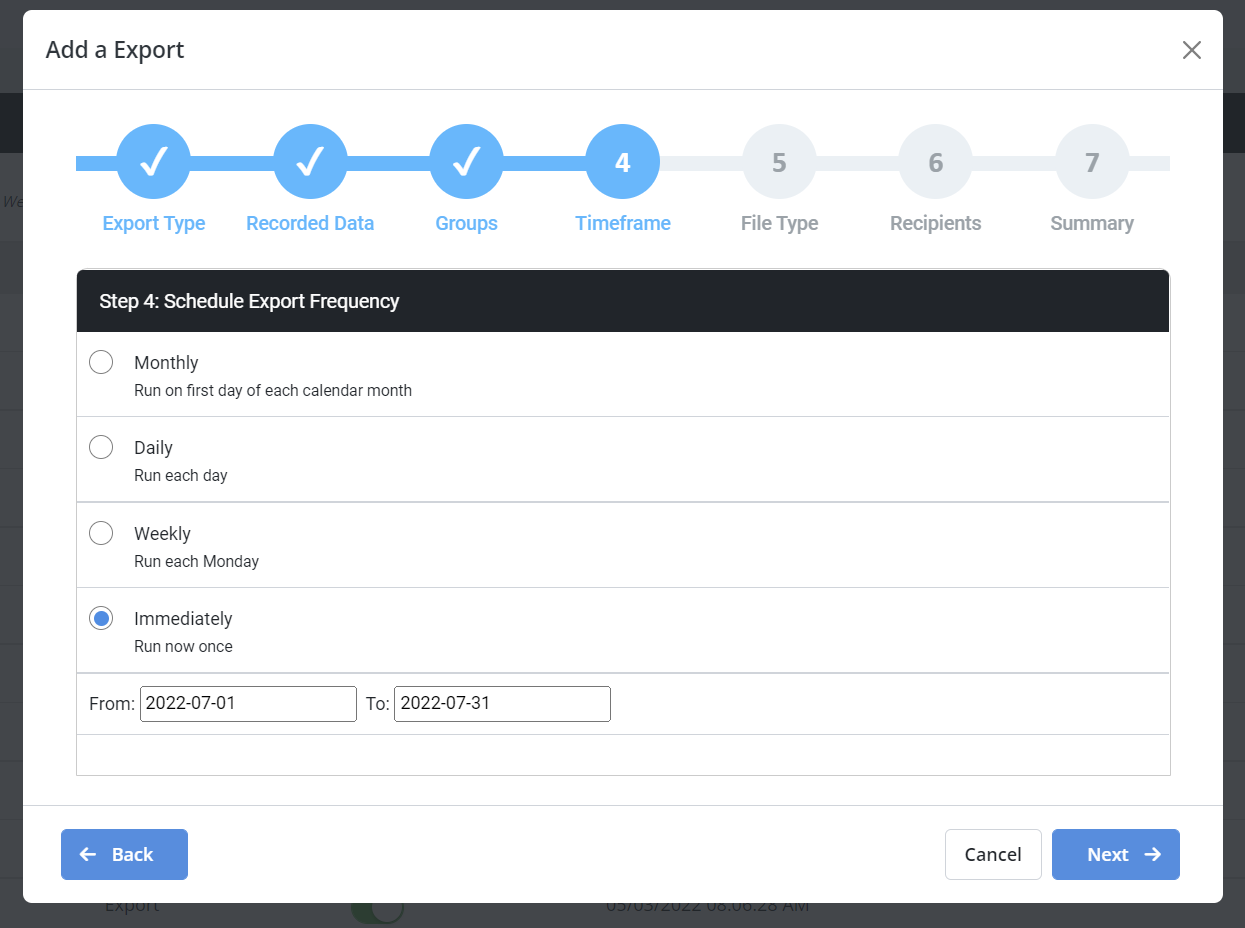
Step 4: Schedule an export frequency (Timeframe). Exports can run:
- Monthly - The export runs on the first day of each month and exports data from the previous month.
- Daily - The export runs each day, exporting data from the previous day.
- Weekly - The export runs each Monday, exporting data from the previous week.
- Immediately - The export runs now, one time. Choose Immediately to select a time range in the past.
Step 5: Select the type of file to export: PDF or Excel. You will be able to view the export from this page.
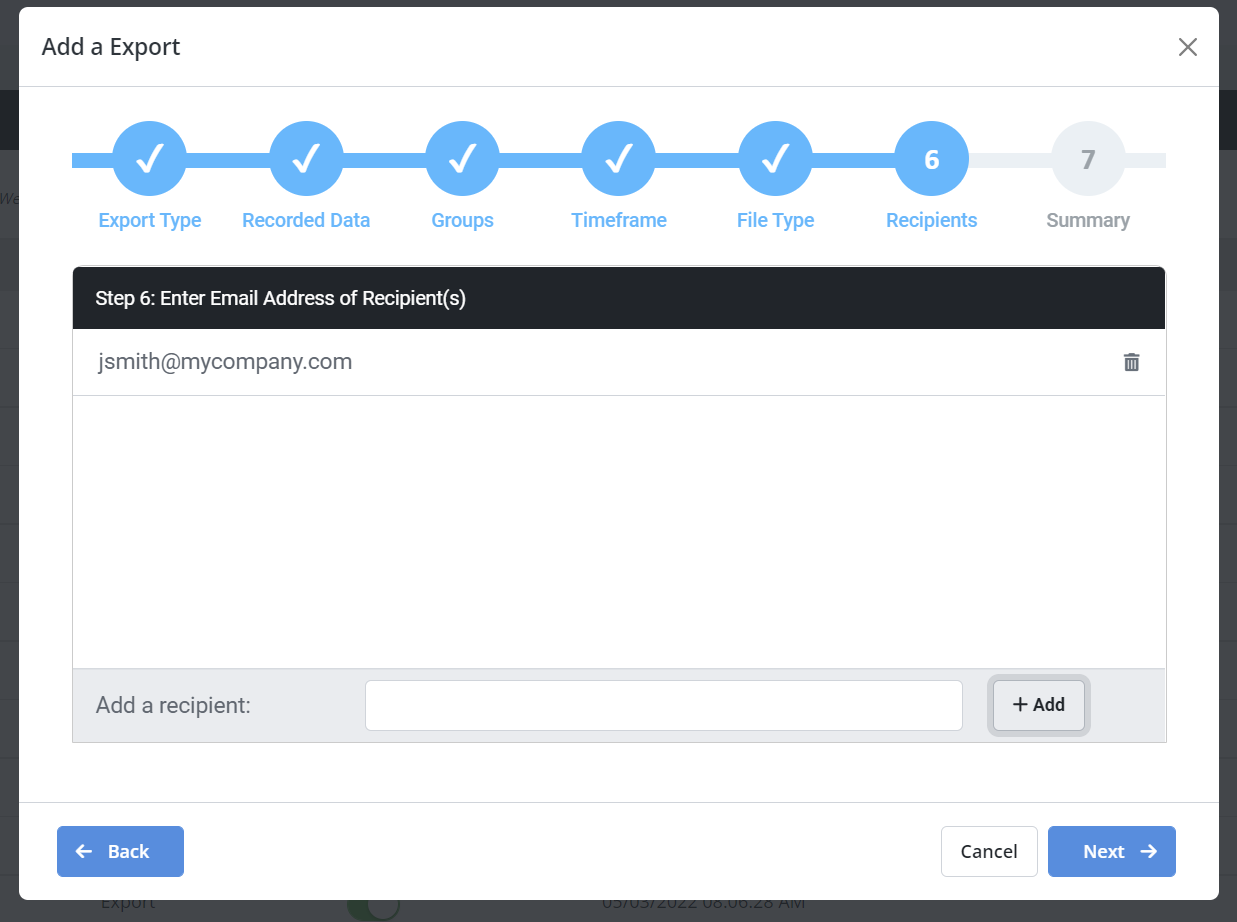
Step 6: Enter email addresses for people to notify when the export is ready.
Type an address at the bottom of the panel and press Add.
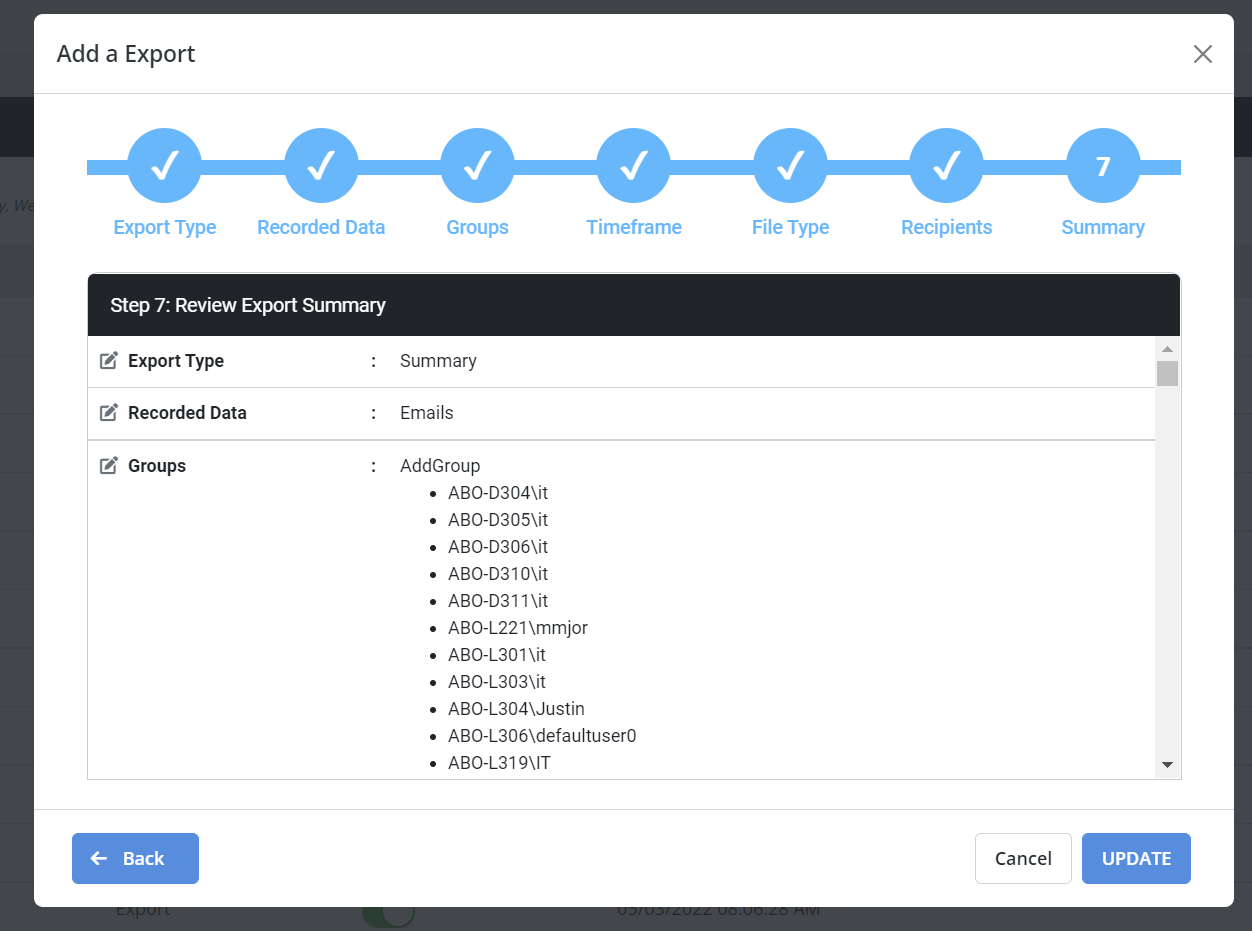
Step 7: Review your selections on the Summary panel. Go Back to make corrections if needed, then press Create.
Detailed exportDetailed export data criteria
For a Detailed Export, you can choose from sets of data types for computers and/or for mobile devices.
| Computers | Mobile Devices |
|
|
Summary exportSummary export data criteria
For a Summary Export, choose one or more types of data:
-
Emails
-
Programs
-
Text Messages
-
Calls
-
Photos
-
Snapchat Photos
-
Instagram Photos
-
WhatsApp Messages
-
Skype Instant Messaging
-
Deleted Text Messages
-
Kik Messages
Edit an exportEdit an export
In the top Scheduled Exports panel, click the Edit edit icon at the right end of the row. The Reports wizard opens, and you can step Back through the panels, making changes as you wish. When the changes are complete, click Update on the Summary page.
Stop or delete exportsStop or delete exports
- Stop a scheduled export - In the top Scheduled Exports panel, switch the On/Off button to OFF (gray).
- Delete scheduled export - In the top Scheduled Exports panel, press the Delete trash icon at the right end of the row. You are asked to confirm the deletion.
- Delete a requested or complete expoort - in the bottom Recent Exports pane, press Delete trash at the right end of the row.
Updated: 05/01/2023