Antivirus Exclusions - Windows
Setting antivirus exclusions is standard practice when installing network-wide software. Some antivirus programs acknowledge the importance of Workplace Behavior Analytics, such as Interguard, and will not interfere with our installations. Others may identify the agent as a threat and move files to quarantine, preventing installation and operation.
- Antivirus exclusions for this product will not compromise the safety of the device.
They simply exclude named entities from being scanned by the antivirus. All other files, folders, and downloads are scanned. - If you need to set exclusions at each Windows device:
We provide a PowerShell script that sets exclusions for our files in Microsoft Defender (Windows Security). Depending on how you use Microsoft, you may need this in addition to other antivirus solution exclusions. - If you use a network-wide antivirus solution:
Provide the necessary exclusions to your IT Admin. Follow normal procedures to add Interguard exclusions to your antivirus policies for the devices you plan to monitor. The exclusion policy should be in place before you attempt to install the agent. - If you manage network-wide Microsoft products and use Active Directory:
You can create a Group Policy Object using our file lists to ensure Microsoft Security (Defender) will not quarantine agent installation or uninstallation files.
NOTE: Our software is legal, safe, and, in fact, good business practice on endpoints owned by your organization. Our Antivirus Exclusion Guides may be useful to you, but we recommend going to the latest support for the product you are using.
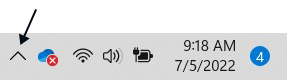
Where do I find antivirus settings?
Most antivirus software icons can be found in a computer's status bar. On a Windows computer, you can usually find the antivirus program icon under the status bar up-arrow (near the date/time). Press the arrow and click on the icon to open the antivirus console.
If your organization manages Windows devices across a network, you may be able to control virus scanning from an endpoint "profile." In the management application, look for antivirus "exclusion," "exception," or "whitelist" settings.
Check our Antivirus Guides for more instructions.
Whitelist agent files using security certificates (best option)
If your managed antivirus solution allows whitelisting using a product's digital certificate, this is the best way to set Veriato agent exclusions. Download and extract a .zip file, which contains a .cer and a .pem certificate file for the latest Windows Agent. Upload the certificate to your antivirus solution's console.
- Download and extract the .zip file.
Click here. - Register the certificates with the program.
Follow the antivirus program's instructions for registering certificates. - Download and install the agent.
See Windows Agent Installation.
Exclude agent folders and files
An antivirus program may allow folder and file exclusions, or just file exclusions. Also, some antivirus solutions require excluding folders/files in multiple locations, depending on whether the exclusion is a "file" or a "process." Some are both.
- Set antivirus exclusions BEFORE downloading and installing the agent.
In some antivirus programs, you simply enter the name of each exclusion; in others, you must select a folder or file that already exists. An antivirus solution may have multiple types of scanning, such as real-time, manual, scheduled, etc. You may have to list exclusions in more than one area. - Disable or pause protections during agent installation.
Avoid installation frustration! You can re-enable all settings following agent installation. - If the exclusions don't work, or the installation fails:
Review the antivirus provider's documentation and contact their support center for additional assistance. Antivirus firewalls may need to be temporarily disabled. Contact Veriato Support https://interguard.awarenesstechnologies.com/Main/Chat/frmClientPreChat.aspx for help or for an alternate option.
Agent folder exclusions
The folders to exclude are:
C:\Windows\winipbin-install
C:\Windows\winipbin
C:\Windows\SysWOW64\winipdat
C:\Windows\System32\winipdat
Agent download and install/uninstall exclusions
Include the following file paths so that you are able to download and install or uninstall the agent:
C:\Users\*\Downloads\VisionInstaller.exe
C:\Users\*\Downloads\uninstall64.exe
C:\Users\*\Downloads\VisionInstaller_Auto-Reboot-Disabled.exe
C:\Windows\SysWOW64\Uninstaller.exe
Exclude processes
If your antivirus solution allows excluding processes, exclude these files:
C:\Windows\winipbin\mrstch.exe
C:\Windows\winipbin\mxcrsc32.exe
C:\Windows\winipbin\wlcnthr.exe
C:\Windows\winipbin-install\Admin.exe
C:\Windows\winipbin-install\SPSetupWin.exe
C:\Windows\winipbin-install\Preinstaller.exe
C:\Windows\winipbin-install\spsetup.exe
C:\Windows\winipbin-install\spsetup64.exe
C:\Windows\winipbin-install\SDFMigrator.exe
C:\Windows\winipbin\SDFMigrator.exe
C:\Windows\winipbin-install\bootstrap.exe
C:\Users\*\Downloads\VisionInstaller.exe
C:\Users\*\Downloads\VisionInstaller_Auto-Reboot-Disabled.exe
C:\Users\*\Downloads\uninstall64.exe
C:\Windows\SysWOW64\Uninstaller.exe
C:\Windows\winipbin-install\Uninstaller.exe
Exclude the winipbin-install files
This folder is used to install the agent. Usually, the folder exclusion works. If necessary, exclude each file.
For Windows x64 devices:
VisionInstaller.exe
C:\Windows\winipbin-install\SPSetupWin.exe
C:\Windows\winipbin-install\Config.txt
C:\Windows\winipbin-install\spsetup.exe
C:\Windows\winipbin-install\SR_TmpRun.ini
C:\Windows\winipbin-install\spsetup.log
C:\Windows\winipbin-install\SPSetup64.exe
C:\Windows\winipbin-install\Admin.exe
C:\Windows\winipbin-install\MSVxRsc.dll
C:\Windows\winipbin-install\SPSetup64.log
C:\Windows\winipbin-install\ra.dll
C:\Windows\winipbin-install\crbundl\crx618031\icons\icon16.png
C:\Windows\winipbin-install\crbundl\crx618031\manifest.json
C:\Windows\winipbin-install\crbundl\crx618031\src\bg\spbackground.js
C:\Windows\winipbin-install\crbundl\crx618031\src\content\spcontent.js
C:\Windows\winipbin-install\crbundl\crx618031\src\content\splocal.js
C:\Windows\winipbin-install\crbundl\crxsource.zip
If you are still recording Windows x86 devices, add the following install files:
NOTE: We no longer test and support x86 devices with our agent, but they are still working for some customers.
C:\Windows\winipbin-install\UUU4BAA.tmp
C:\Windows\winipbin-install\UUU5551.tmp
C:\Windows\winipbin-install\UUU5530.tmp
C:\Windows\winipbin-install\crbundl\crx89312\icons\icon16.png
C:\Windows\winipbin-install\crbundl\crx89312\manifest.json
C:\Windows\winipbin-install\crbundl\crx89312\src\bg\spbackground.js
C:\Windows\winipbin-install\crbundl\crx89312\src\content\spcontent.js
C:\Windows\winipbin-install\crbundl\crx89312\src\content\splocal.js
Exclude winipbin files
This folder stores the installed agent files and is used during and following installation. Usually, the folder exclusion works. If necessary, exclude each file.
For Windows x64 and x86 devices during installation:
C:\Windows\winipbin\dosudweb32.dll
C:\Windows\winipbin\support.crx
C:\Windows\winipbin\support.xml
For Windows x64 and x86 devices following installation
C:\Windows\winipbin\bissima.dll
C:\Windows\winipbin\bissimo.dll
C:\Windows\winipbin\cmproxfr.dll
C:\Windows\winipbin\eanipw.dll
C:\Windows\winipbin\hdaocogema.dll
C:\Windows\winipbin\jlyfftin.dll
C:\Windows\winipbin\lrdfcndr.dll
C:\Windows\winipbin\mossimo.dll
C:\Windows\winipbin\mrstch.exe
C:\Windows\winipbin\mxcrsc32.exe
C:\Windows\winipbin\prsthasn.exe
C:\Windows\winipbin\quasima.dll
C:\Windows\winipbin\quasimo.dll
C:\Windows\winipbin\rcxaemap.dll
C:\Windows\winipbin\supportch.crx
C:\Windows\winipbin\supportch.xml
C:\Windows\winipbin\supported.appx
C:\Windows\winipbin\supportf.xpi
C:\Windows\winipbin\svrltmgr.dll
C:\Windows\winipbin\svrltmgr64.dll
C:\Windows\winipbin\svrltwp.dll
C:\Windows\winipbin\svrltwp64.dll
C:\Windows\winipbin\vdorctrl.dll
C:\Windows\winipbin\wdwwsm.dll
C:\Windows\winipbin\wesnthelf.dll
C:\Windows\winipbin\wlcnthr.exe
C:\Windows\winipbin\wzodlg32.dll
C:\Windows\winipbin\yamjrd.dll
C:\Windows\winipbin\zrgrshwin.dll
As you configure users and groups, the following file will be duplicated with numbers representing your group policies appended. If possible, use a wildcard exclusion:
C:\Windows\winipbin\wzodlug\wzodlg32_59824.dll
C:\Windows\winipbin\wzodlug\wzodlg32_*.dll
Exclude the winipdat folder
This folder stores data before uploading it to the server.
For Windows x64 devices, exclude:
C:\Windows\SysWOW64\winipdat\kyqdhy.db
C:\Windows\SysWOW64\winipdat\queue.db
C:\Windows\SysWOW64\winipdat\rhlth.dat
C:\Windows\SysWOW64\winipdat\winipdat.log
If you are still recording Windows x86 devices, add the following:
NOTE: We no longer test and support x86 devices with our agent, but they are still working for some customers.
C:\Windows\System32\winipdat\kyqdhy.db
C:\Windows\System32\winipdat\queue.db
C:\Windows\System32\winipdat\rhlth.dat
C:\Windows\System32\winipdat\winipdat.log
Install the agent on a test device before deploying
- Test your antivirus exclusions.
Make sure the exclusions work before deploying the agent across your network. See Windows Agent Installation. - If, after setting exclusions, the antivirus still detects and removes files, or if the installation fails:
Review the antivirus provider's documentation. Contact the antivirus provider's support center for assistance. Antivirus firewalls may need to be temporarily disabled. Contact Veriato Support https://interguard.awarenesstechnologies.com/Main/Chat/frmClientPreChat.aspx for help or for an alternate option. - To verify installation, check Admin | Endpoint Agents.
Devices appear in the list on this page following successful installation. Contact Support if you have questions.
Updated: 07/25/2024