Groups & Policies - Groups
Not available to "Limited" logins
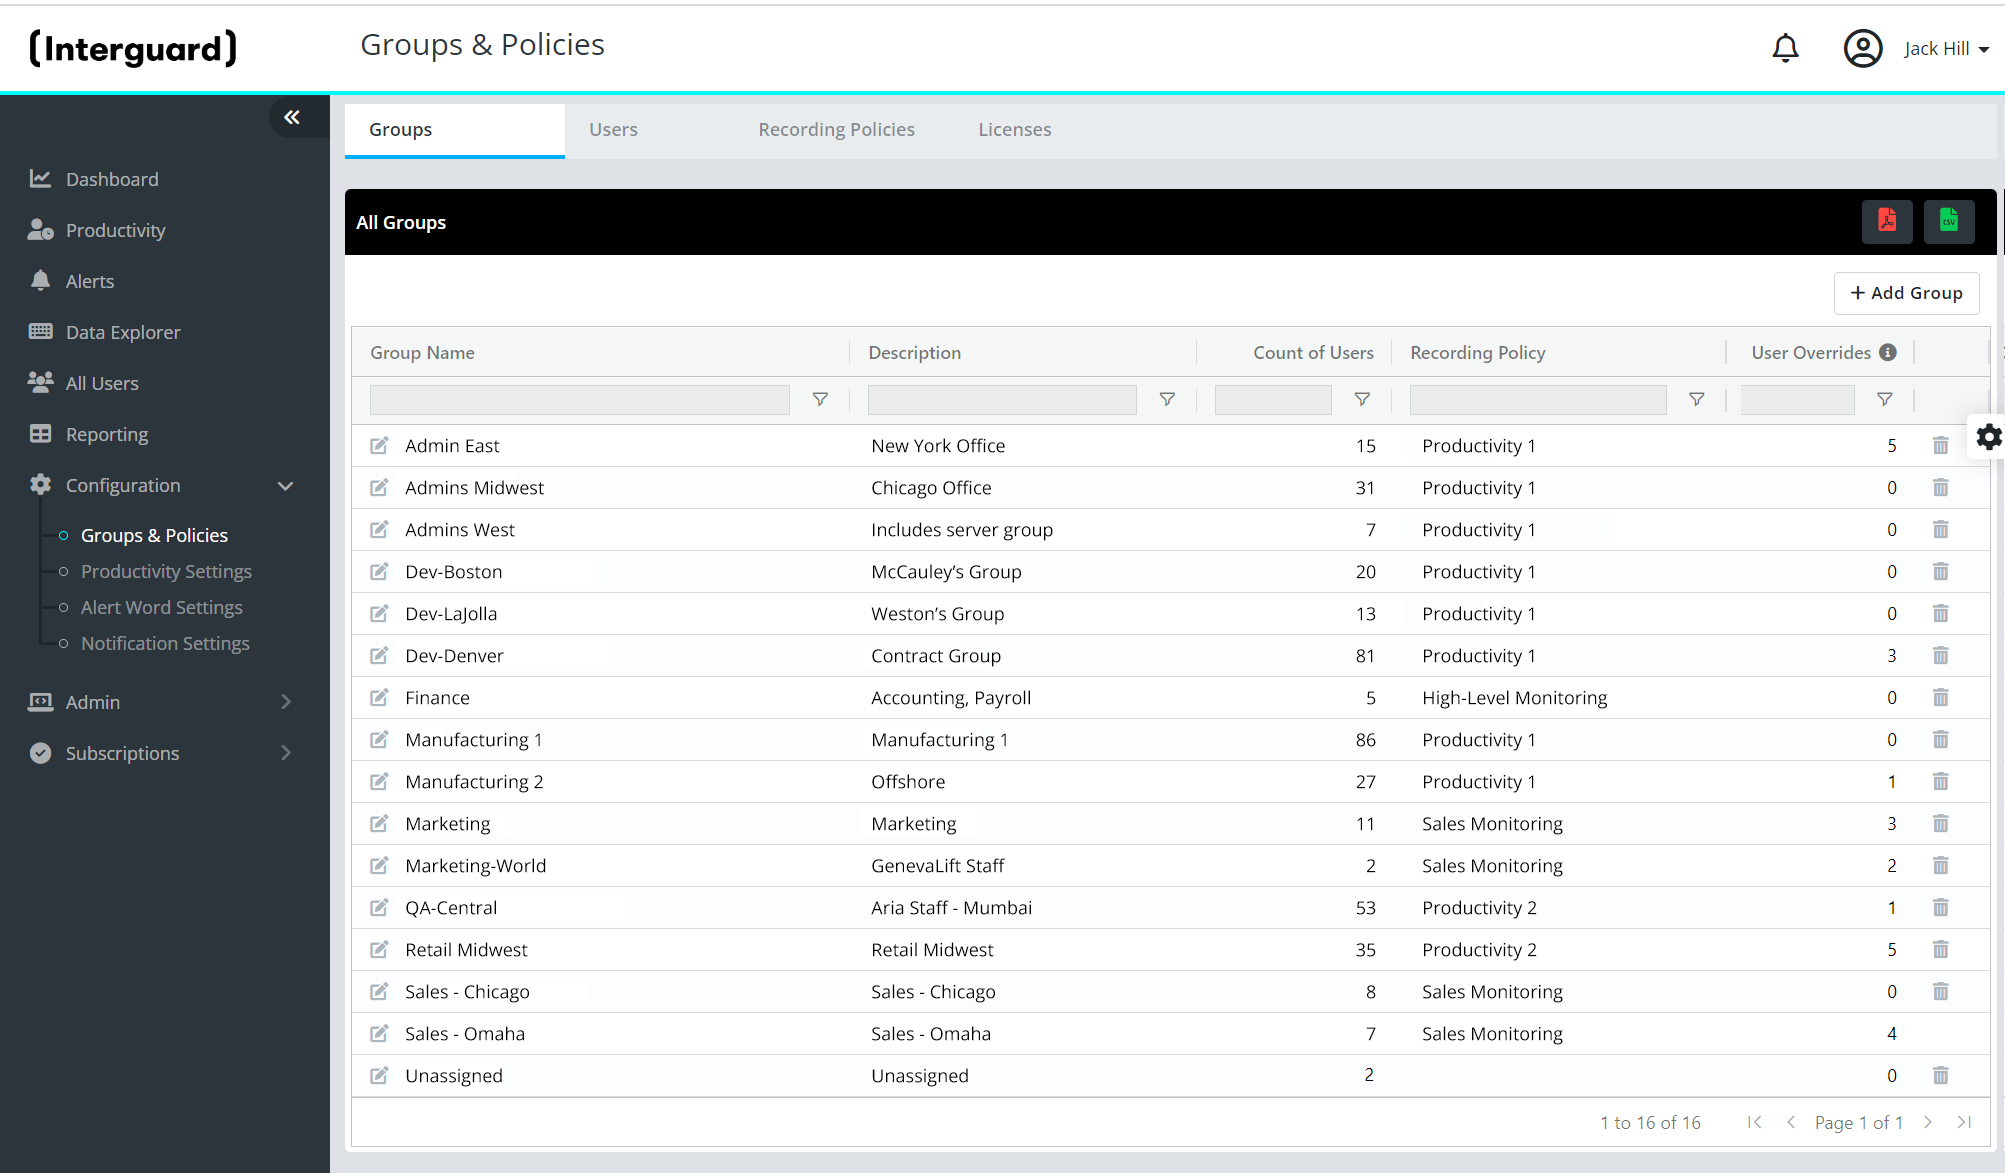
Groups allow administrators and managers to organize monitored users in a way that mirrors the corporate structure. Groups (associated with a Recording Policy) allow defining unique settings for different job functions or departments. For example, using Facebook may be a critical job function for an employee on your marketing team, but not your finance team. If your account is limited to specific groups, you will see only your allowed groups.


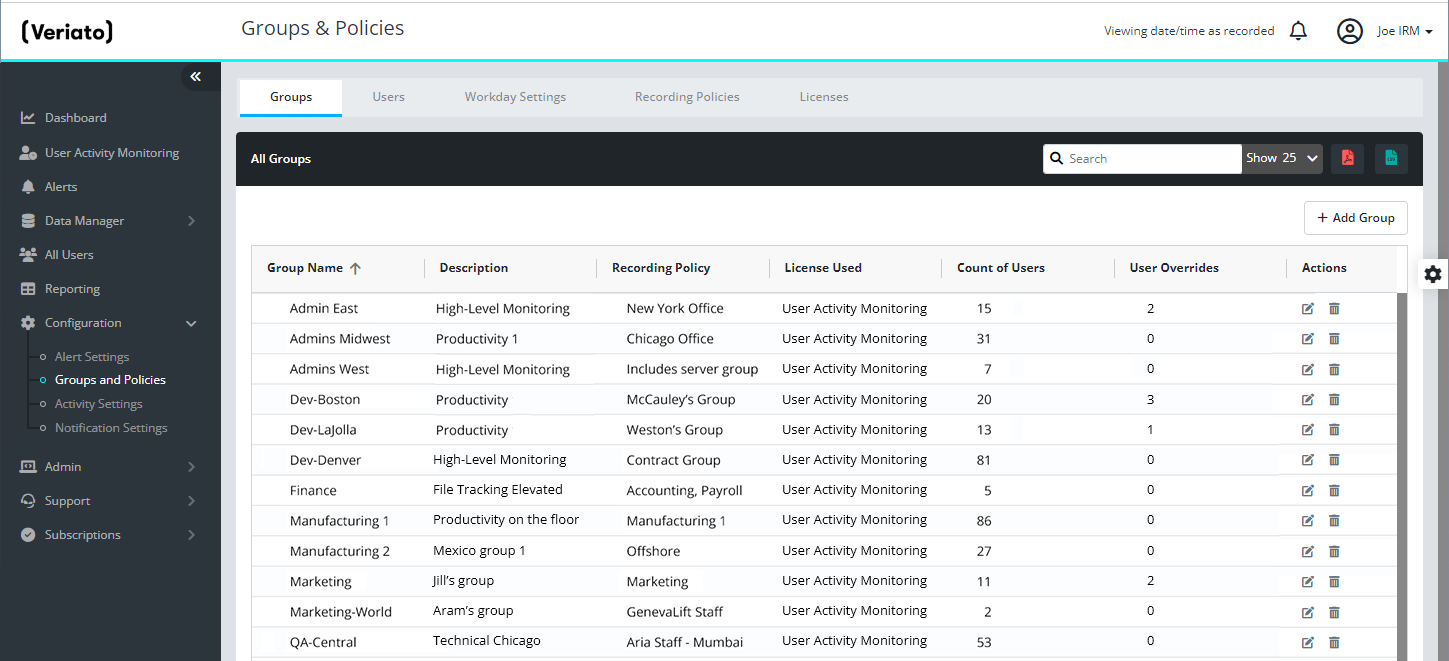
Figure: Groups & Policies - Groups
IMPORTANT: You'll need at least one Recording Policy defined to set up a group. To monitor users, YOU MUST MOVE them into a group with a Recording Policy.
What you need to know about groups
Interguard settings are primarily set by "group." Productivity settings apply to a group, a Recording Policy is applied to a group.
- Unassigned - When users log in for the first time to a monitored device, they are added to the "Unassigned" group. The devices they log into are listed in Endpoint Agents as "Unassigned". The agent on the devices is not yet recording.
- Recording Policy - Each ADDED group is assigned a recording policy (based on a license type). Create at least one Recording Policy before you add groups.
- censes - Each user moved into a group is assigned a license of the License Type used by the group's recording policy. Moving a user from one group to another may use a different license.
- OvLierrides - If necessary, you can switch a user within a group to a different policy (without moving the user out of the group) with an Override.
NOTE: From Endpoint Agents, you can move devices into any of your groups. The group will NOT affect recording at the device or the relationship of user to the device in the data.
Add a group Add a group
Administrator logins only.
To add a user group:
- From the Interguard sidebar, select Configuration | Groups & Policies.
- If you have no recording policies, select the Recording Policies tab and Add a Recording Policy.
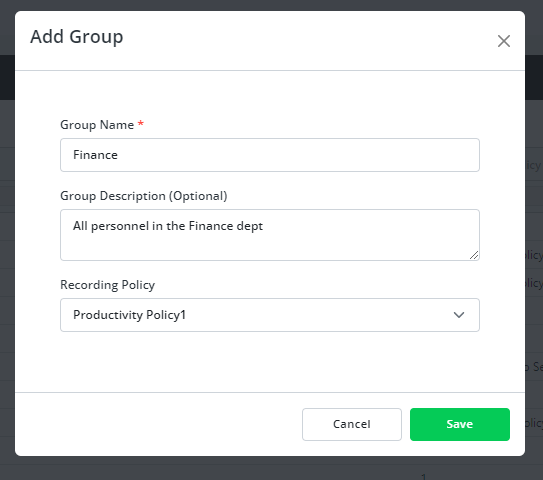
- Go back to the Groups tab and press Add Group at the top right of the panel.
- Name the group and provide a description.
- Select a recording policy.
- Press Save.
- The group is added the the All Groups list (in alphabetical order by Group Name).
Add a group 
To move users into the group:
- Go to the Users tab and select (check) the users you want to move into the group.
- Press Move to Group.
- Select the group you created.
Move users into a groupMove users into a group
Administrator logins only.
Delete a groupDelete a group
Administrator logins only.
In Groups & Policies | Groups, press the trashcan icon at the end of the group row you want to remove. Press Delete. Any users in the group are returned to the Unassigned group. If they use the Group Recording Policy, their level of recording may change. If the Group Recording Policy was overriden, the override is maintained.

Updated: 10/18/2022